Connecting your email account
JobDex sends emails through your existing Gmail or Outlook account — I didn't want to run a mail server or ask you to trust me with your credentials. Instead, it uses OAuth, which means you log in directly with Google or Microsoft and grant specific permissions. Your password never touches JobDex.
There's one setup step that takes a bit of effort: creating OAuth credentials through Google or Microsoft's developer console. I know that sounds intimidating — I spent a while figuring out how to make this simpler and unfortunately this is the simplest it gets without me paying for Google's app verification (which I'm working on). The steps below walk you through it exactly.
Setting up Gmail
-
Go to Google Cloud Console Open console.cloud.google.com in your browser. Sign in with the Google account you want to use for sending emails.
-
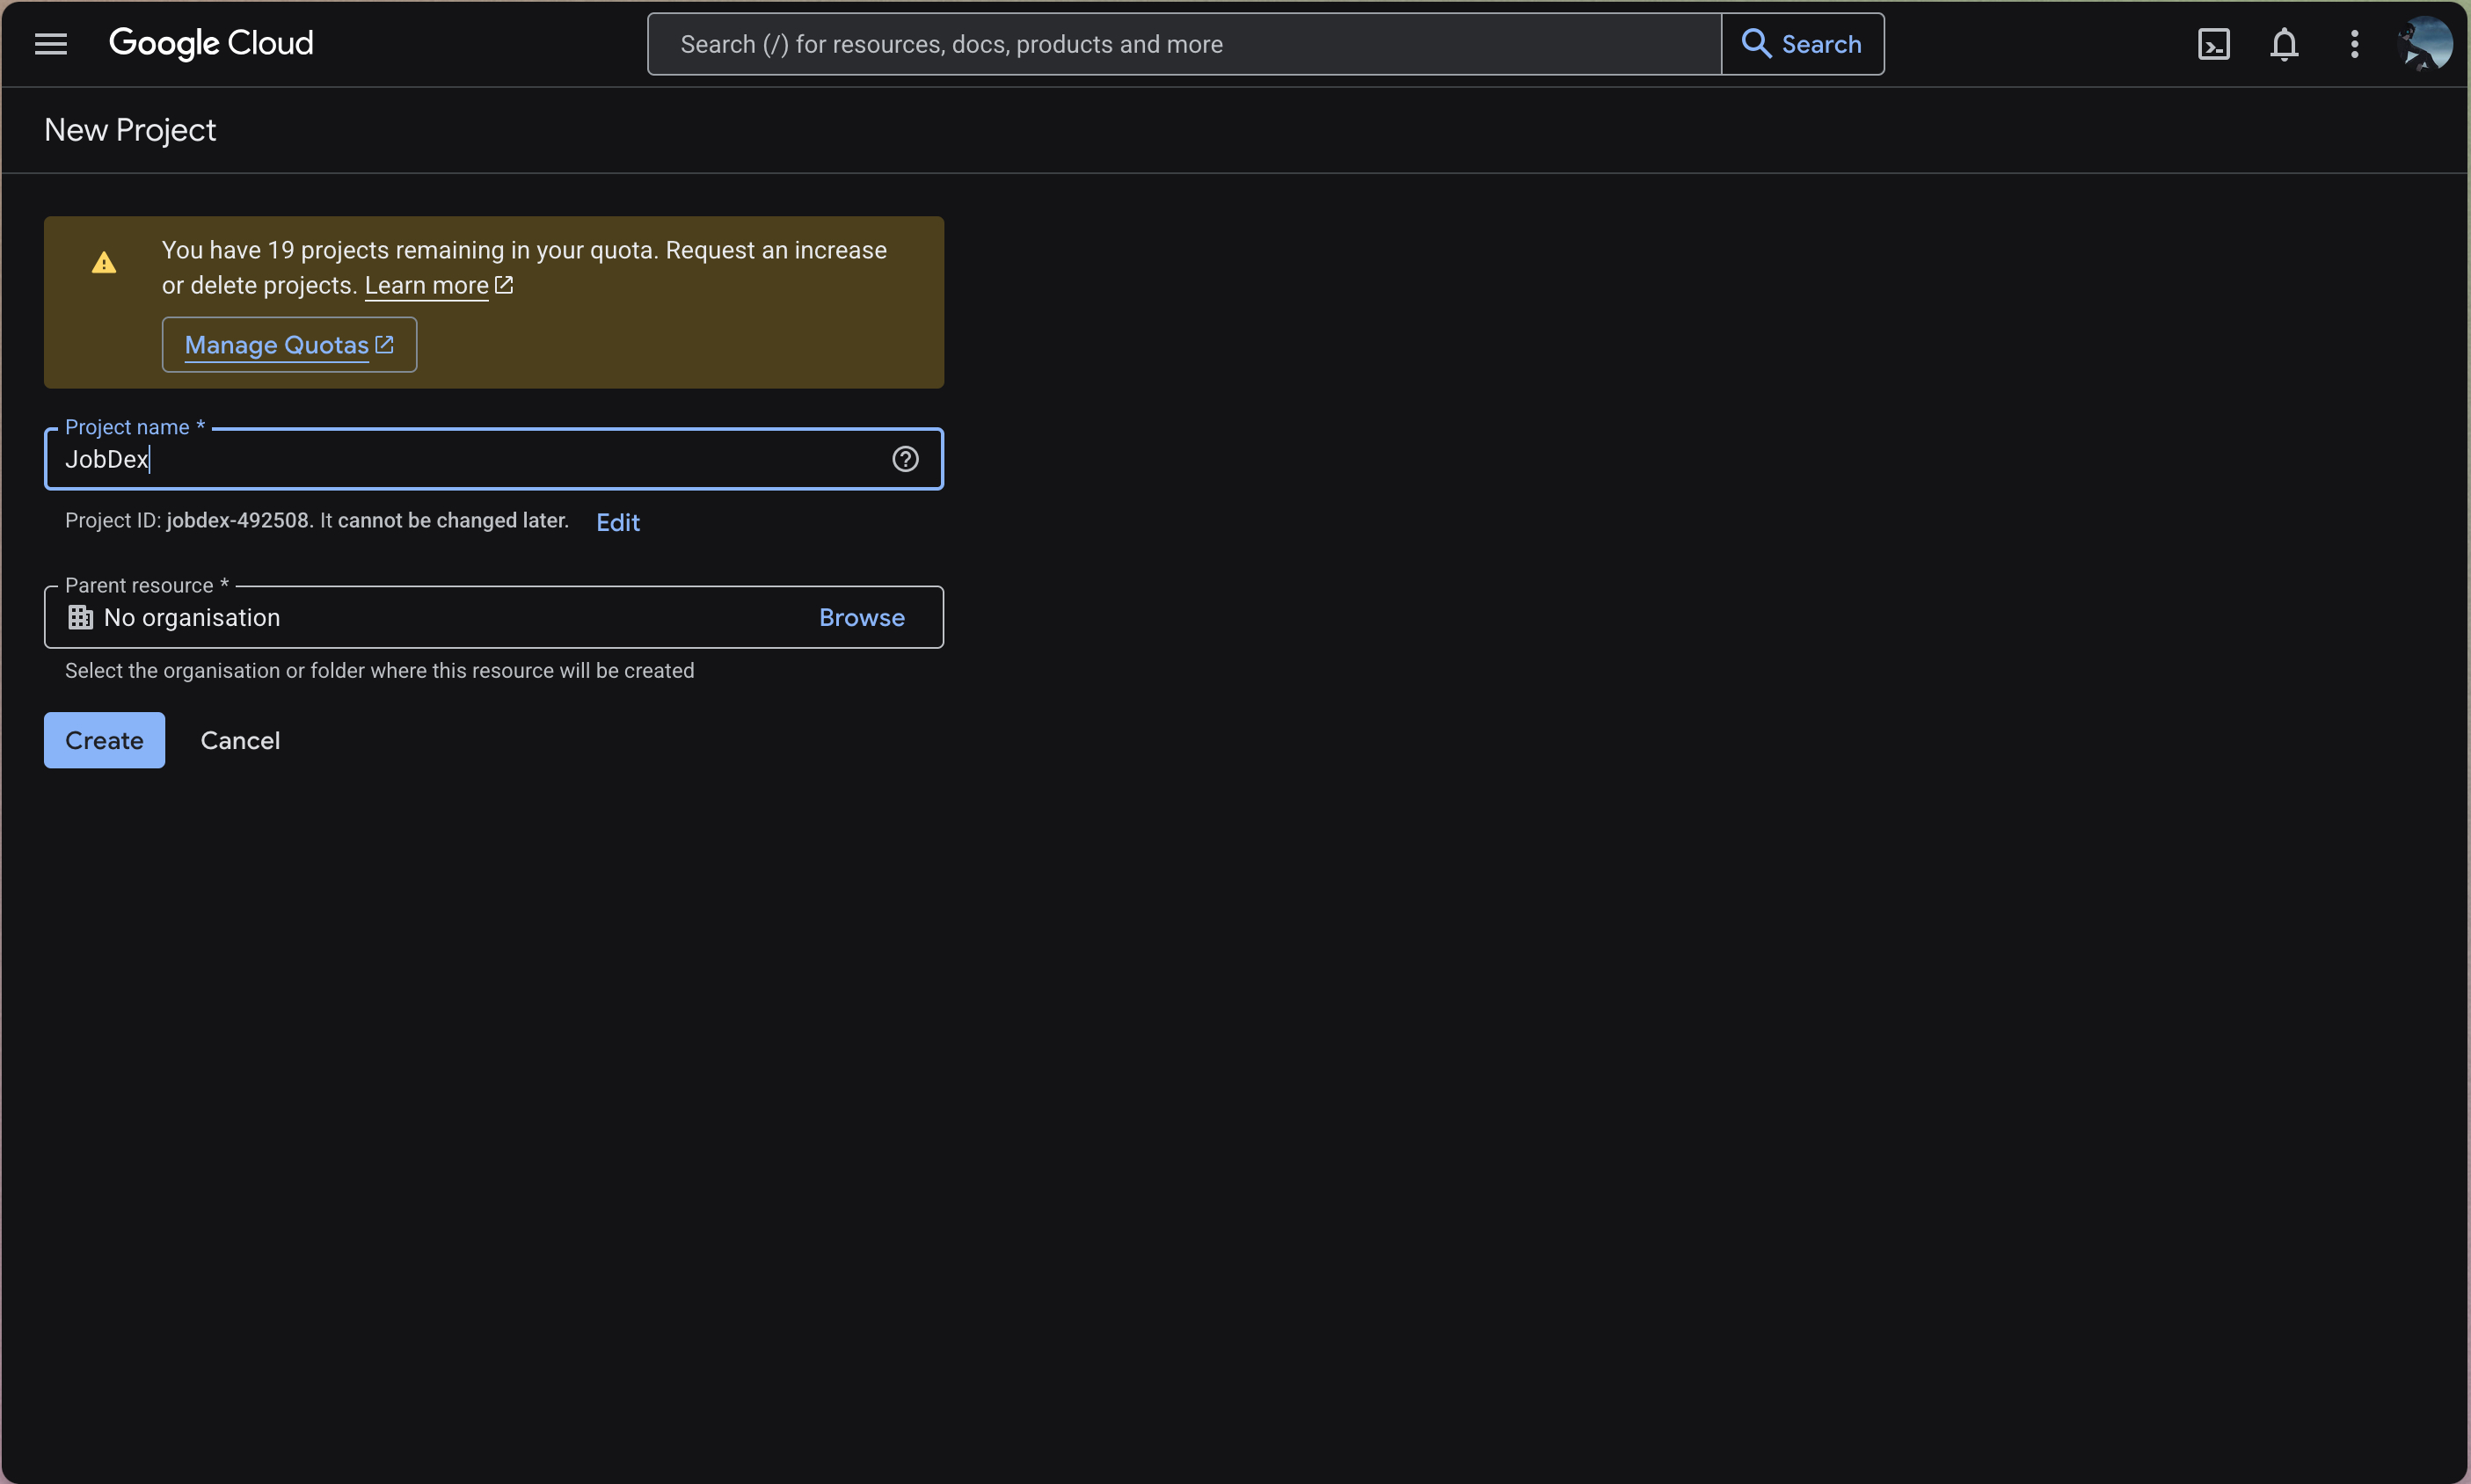
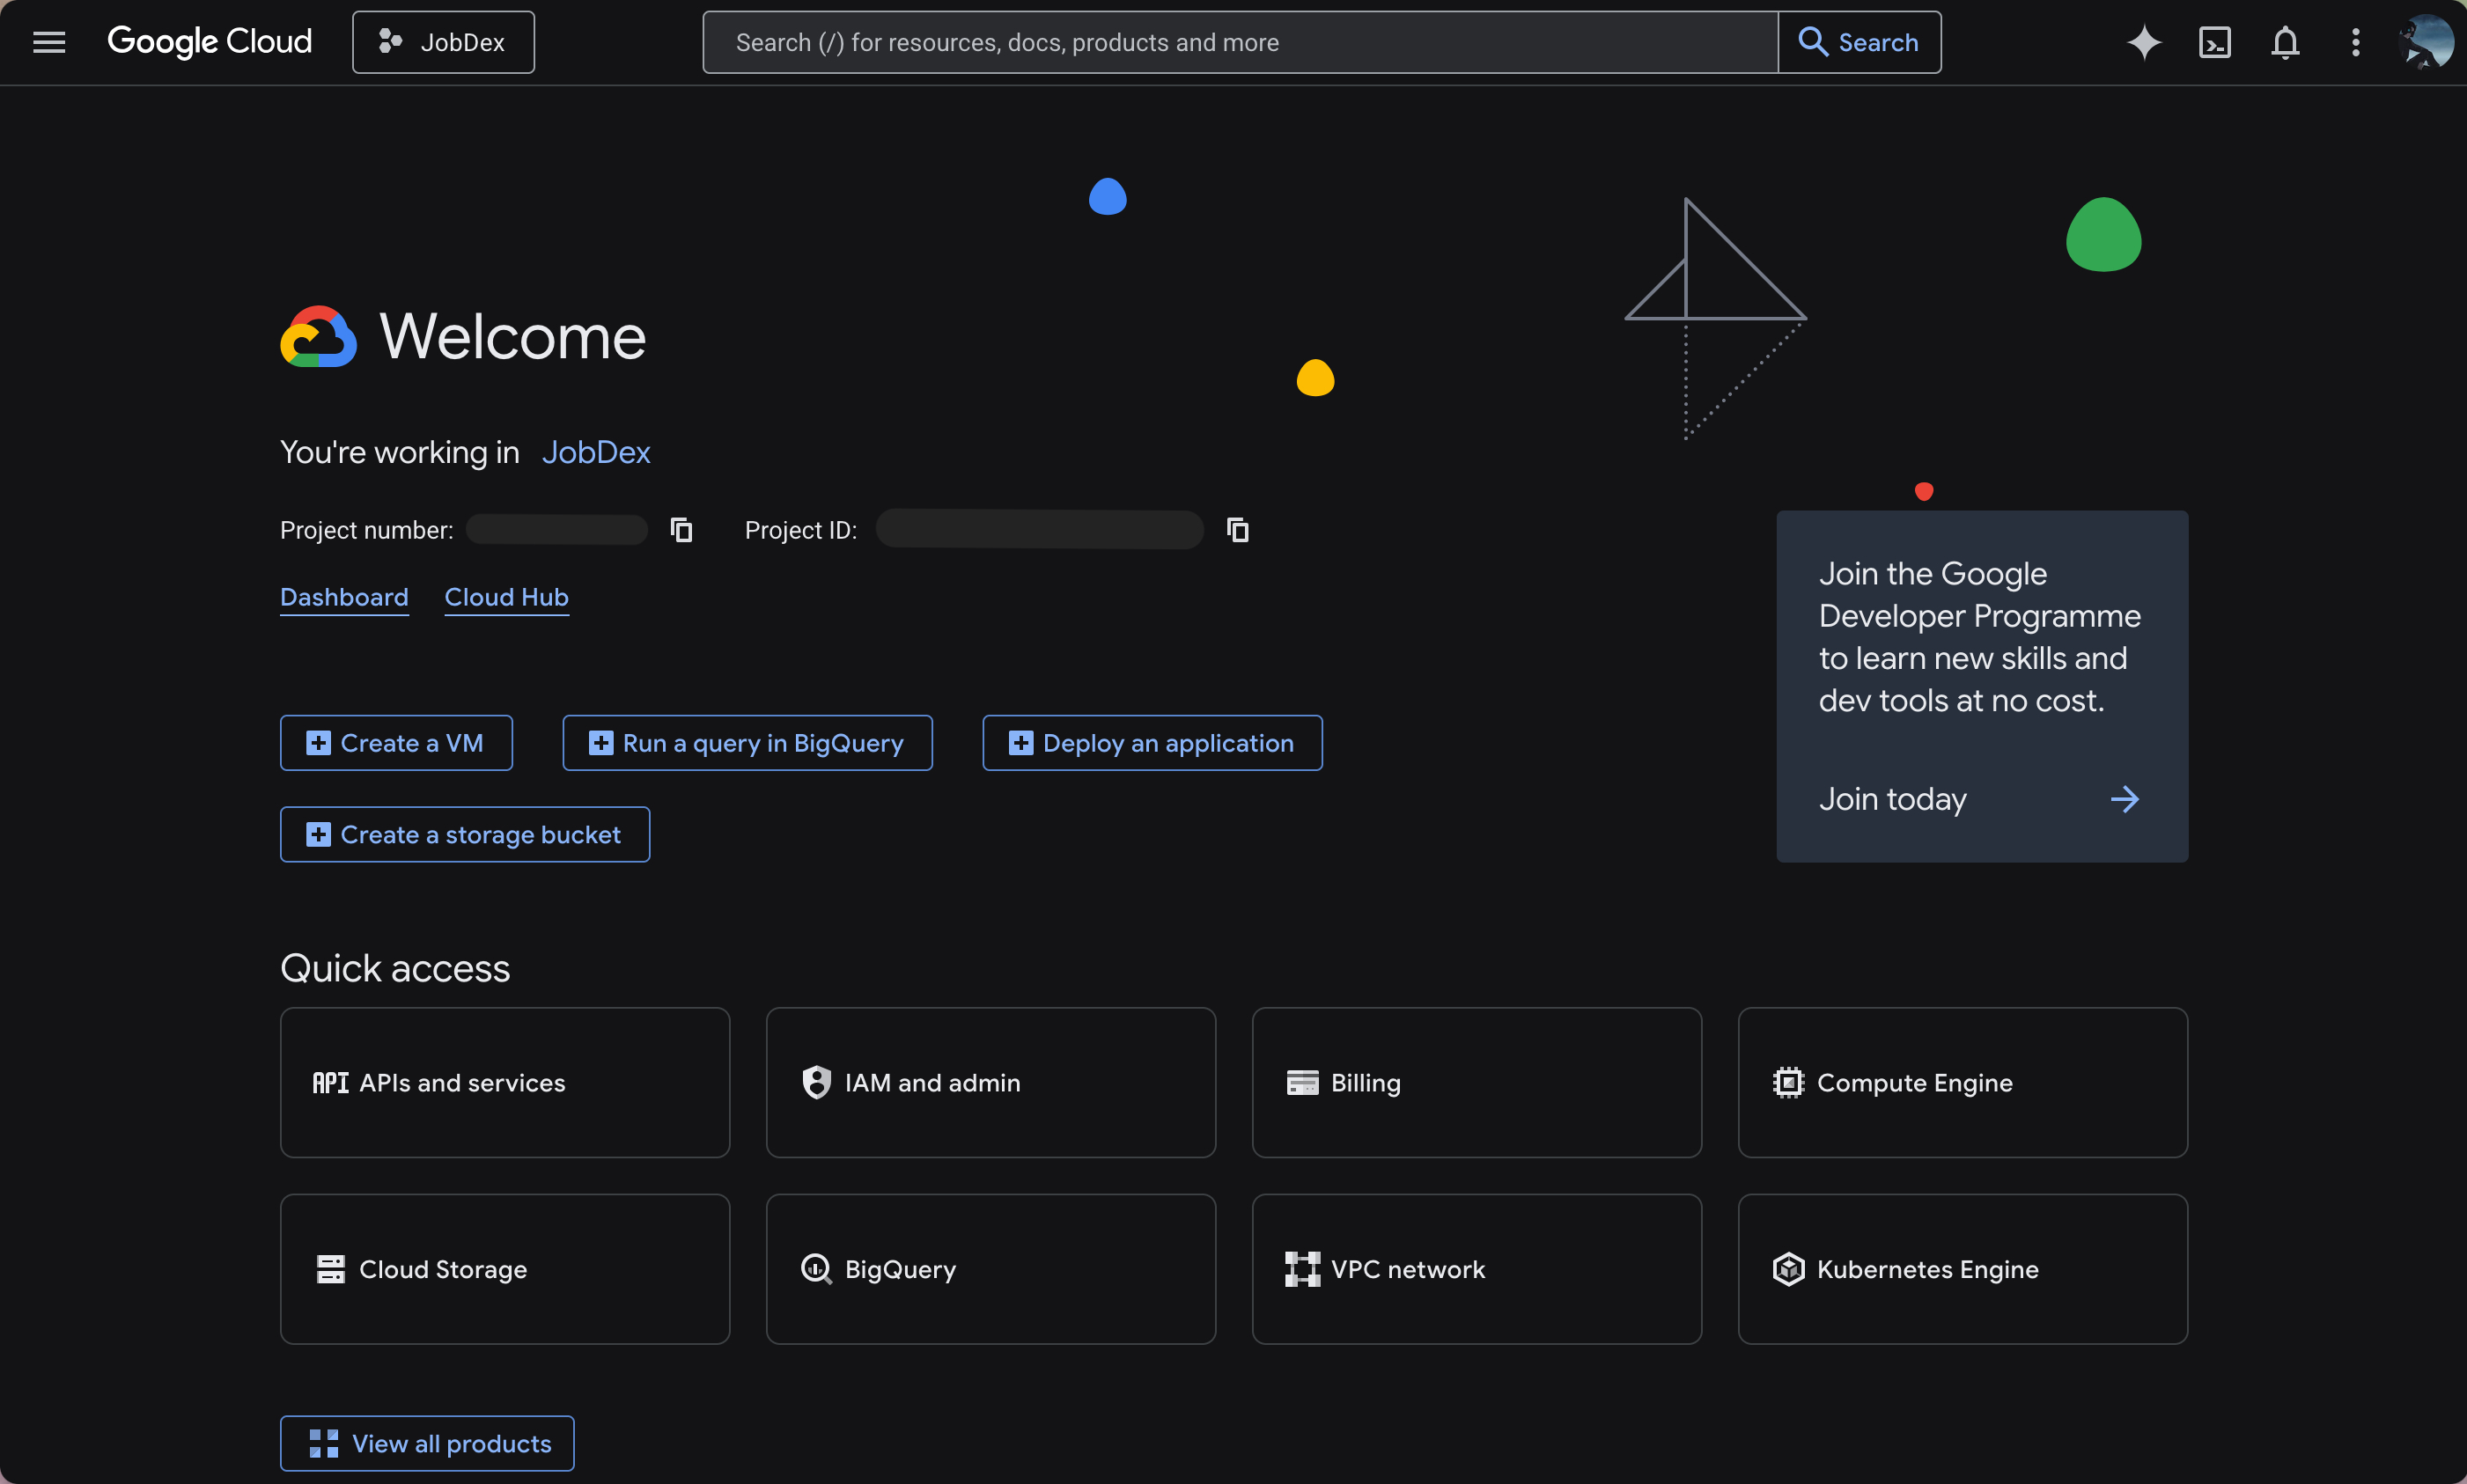
Create a new project Click "New Project". Give it a name (like "JobDex") and click Create. Once it is created, make sure you're on the project homepage.
-
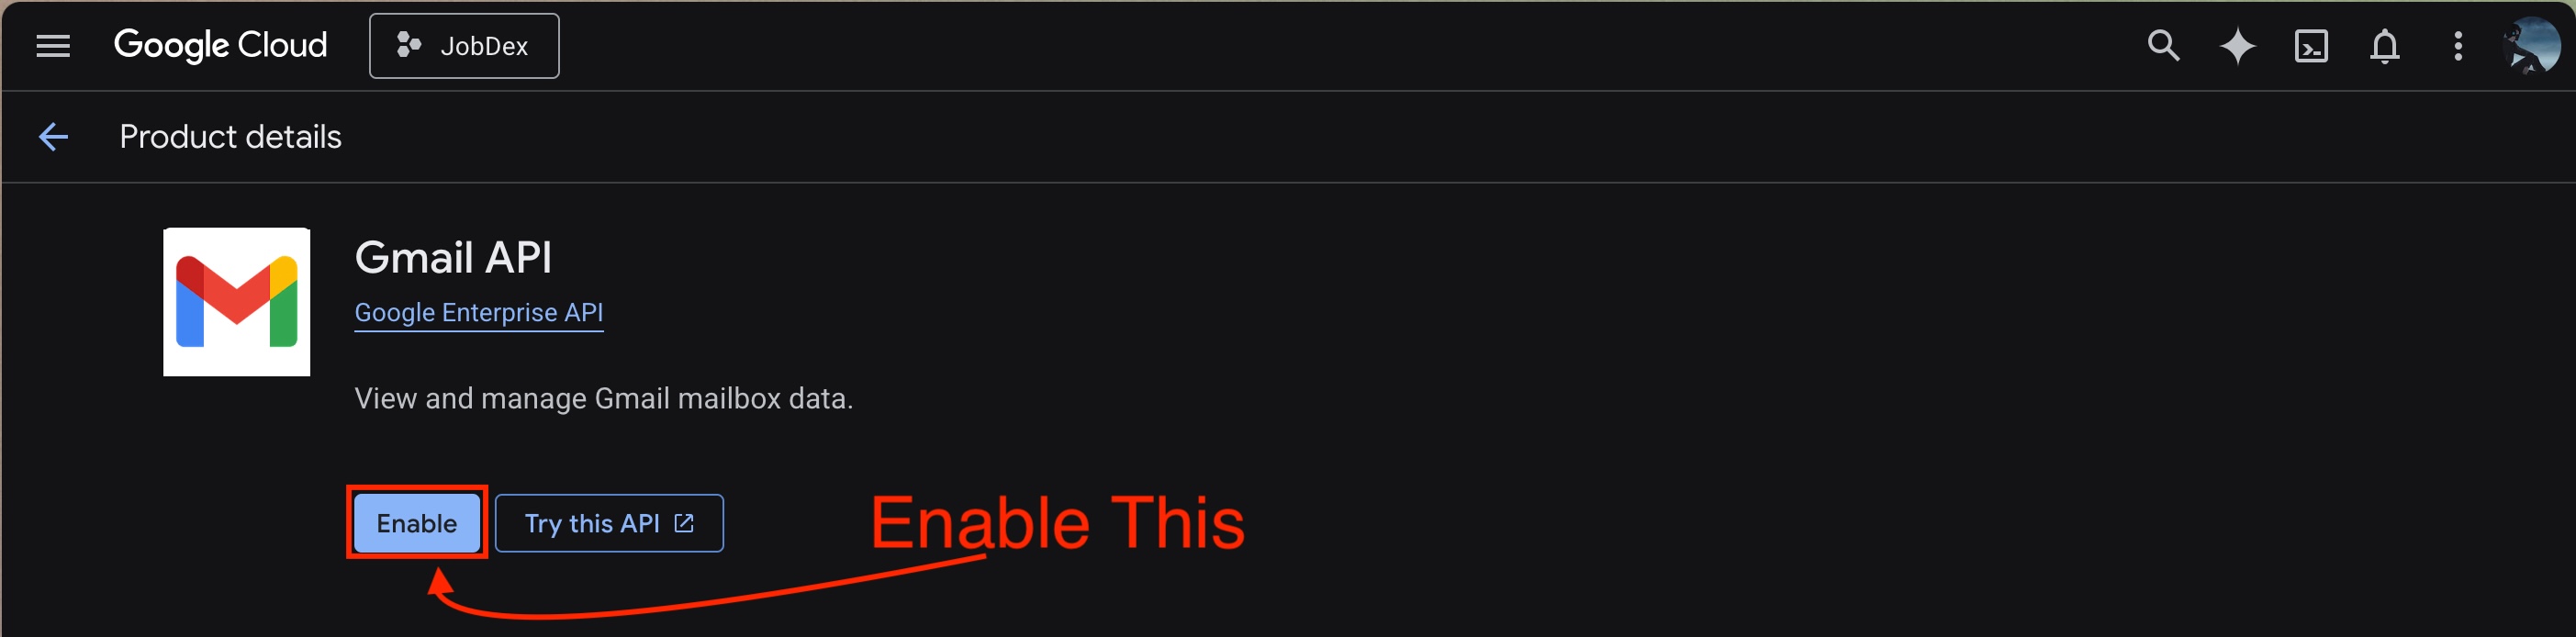
Enable the Gmail API Use the search bar at the top to search for "Gmail API". Click on it in the results, then click the big "Enable" button.
-
Start the OAuth Consent Screen setup In the left sidebar or via the search bar, go to "OAuth consent screen". Under the new onboarding flow, click "Get started".
-
Fill out the basic info Enter an App Name ("JobDex" is fine) and provide your own email for the User Support Email. Select "External" for the audience type. Scroll down to Developer Contact Information and enter your email again. Check the box to agree to the Terms of Service and click "Create".
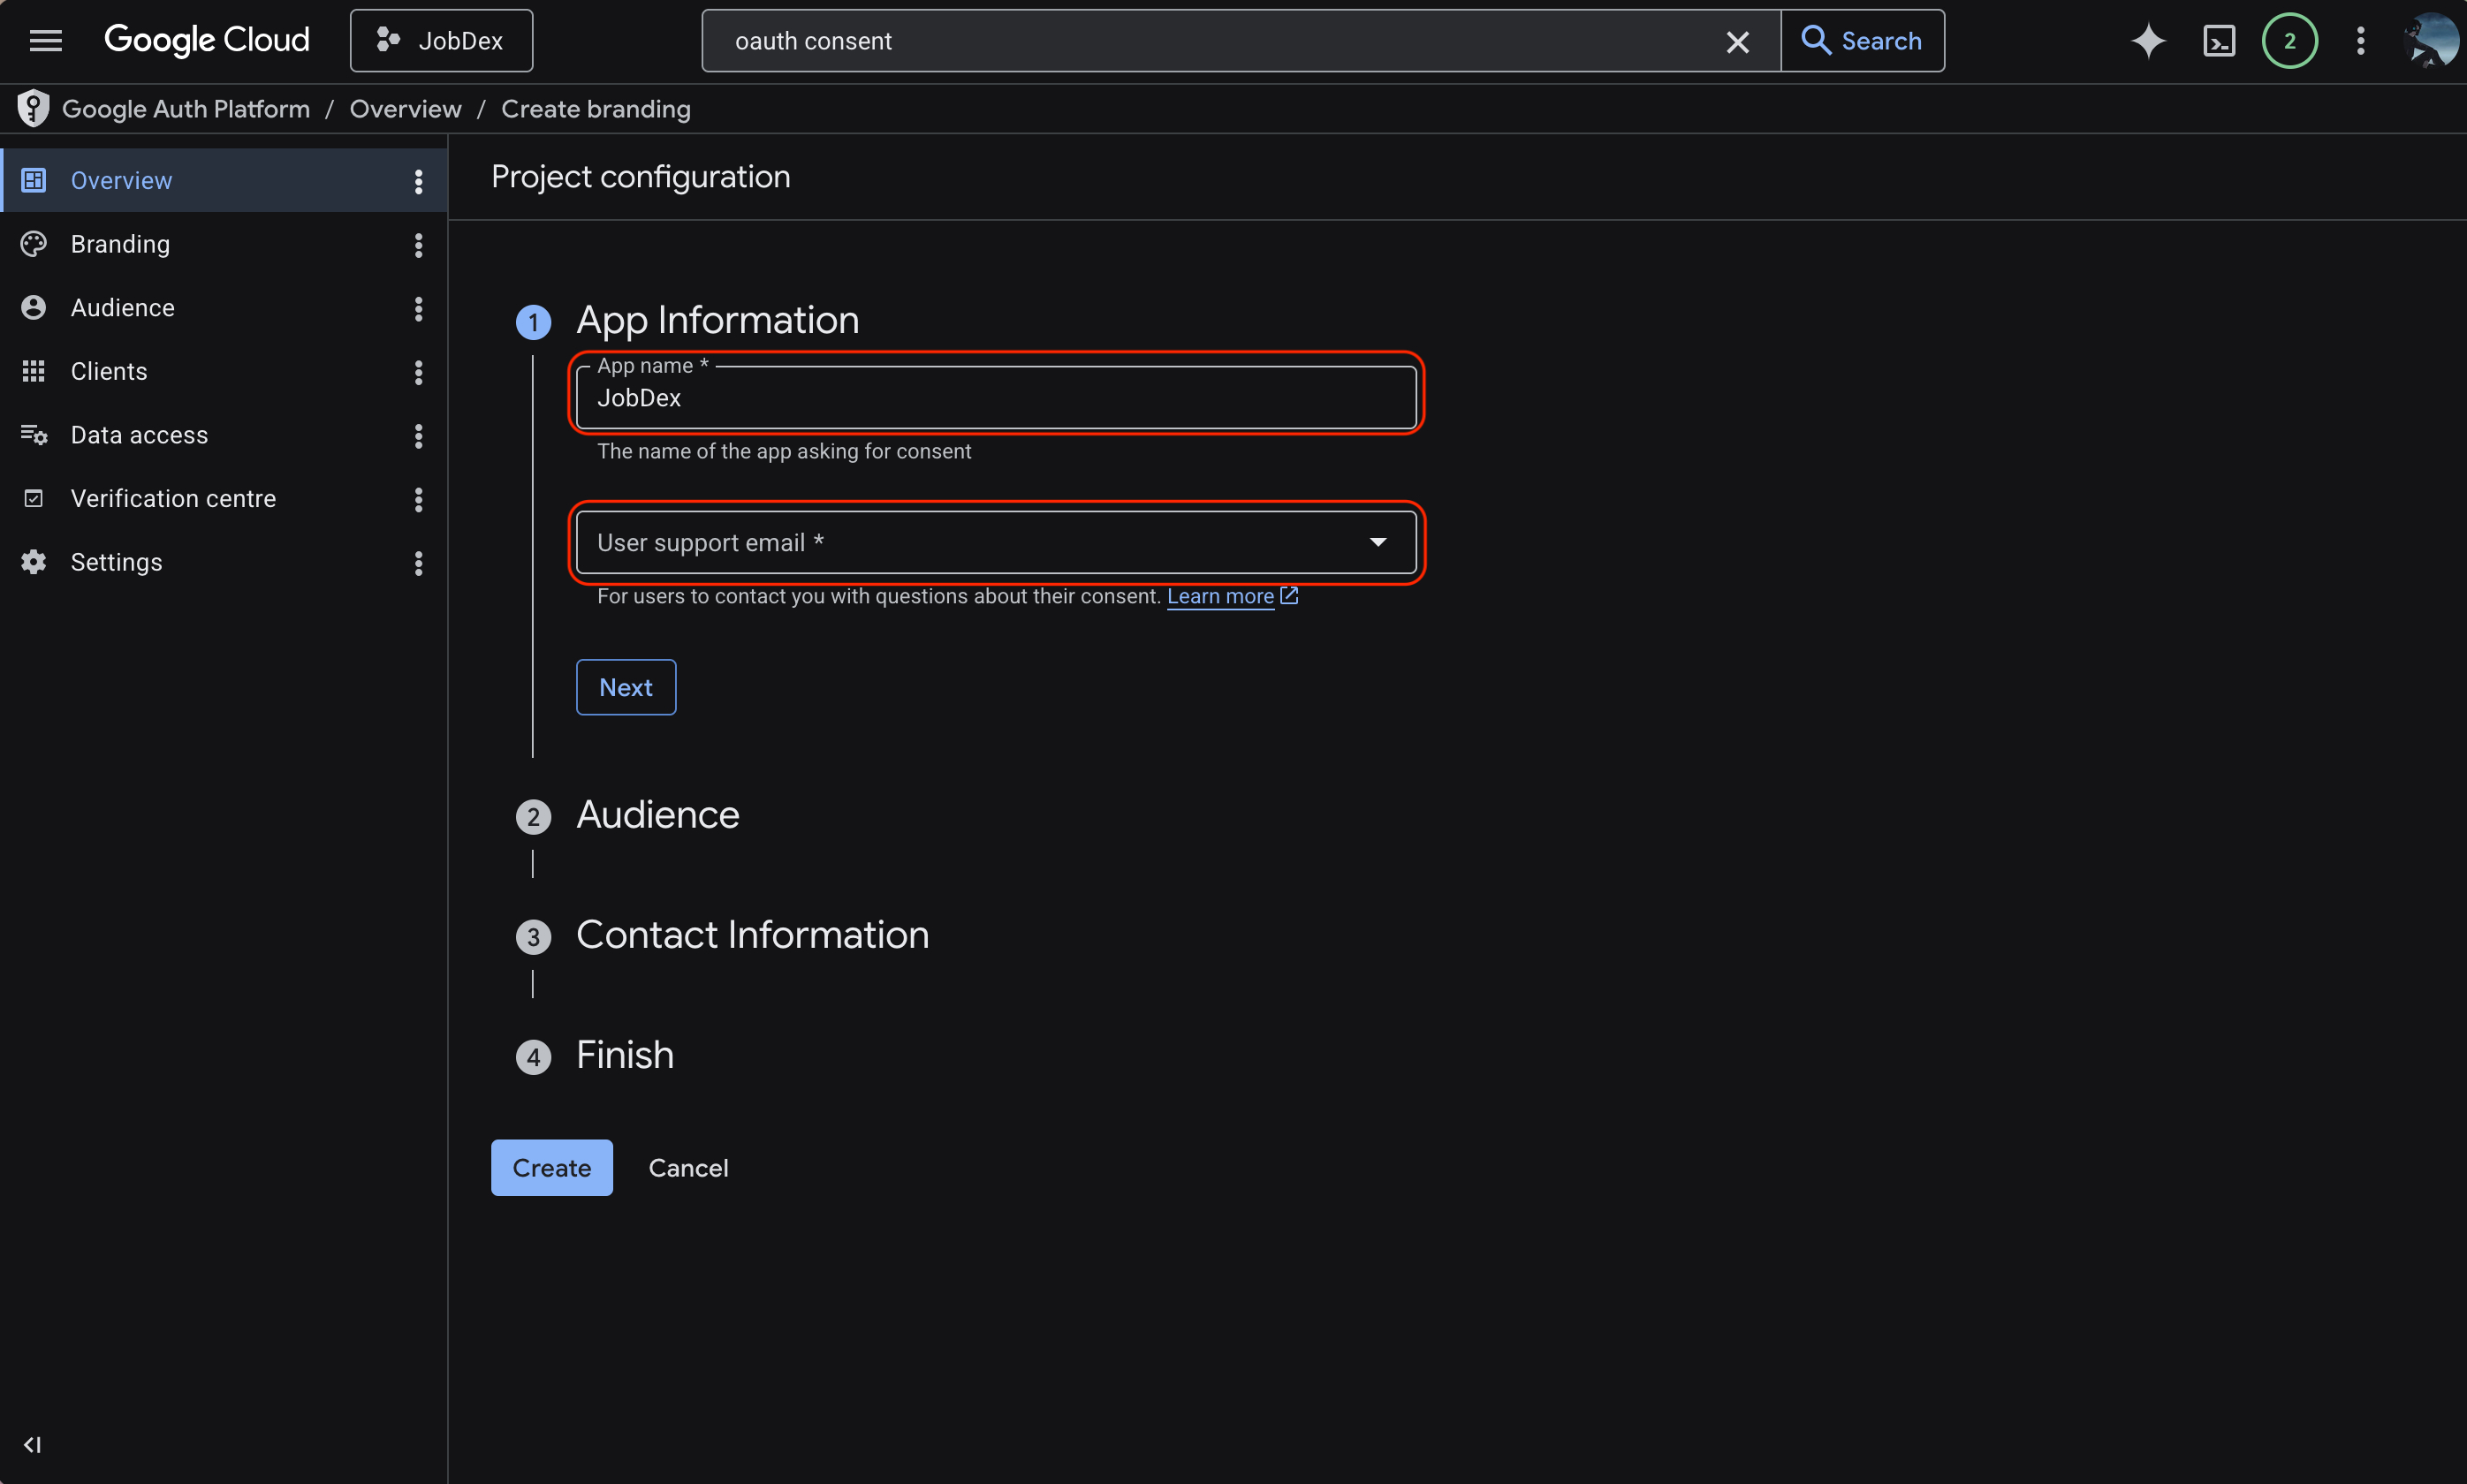
I know this feels like a lot of clicking through Google's console. Fortunately, Google's new setup flow is quite a bit faster than the old one, and you only ever have to do this once.
-
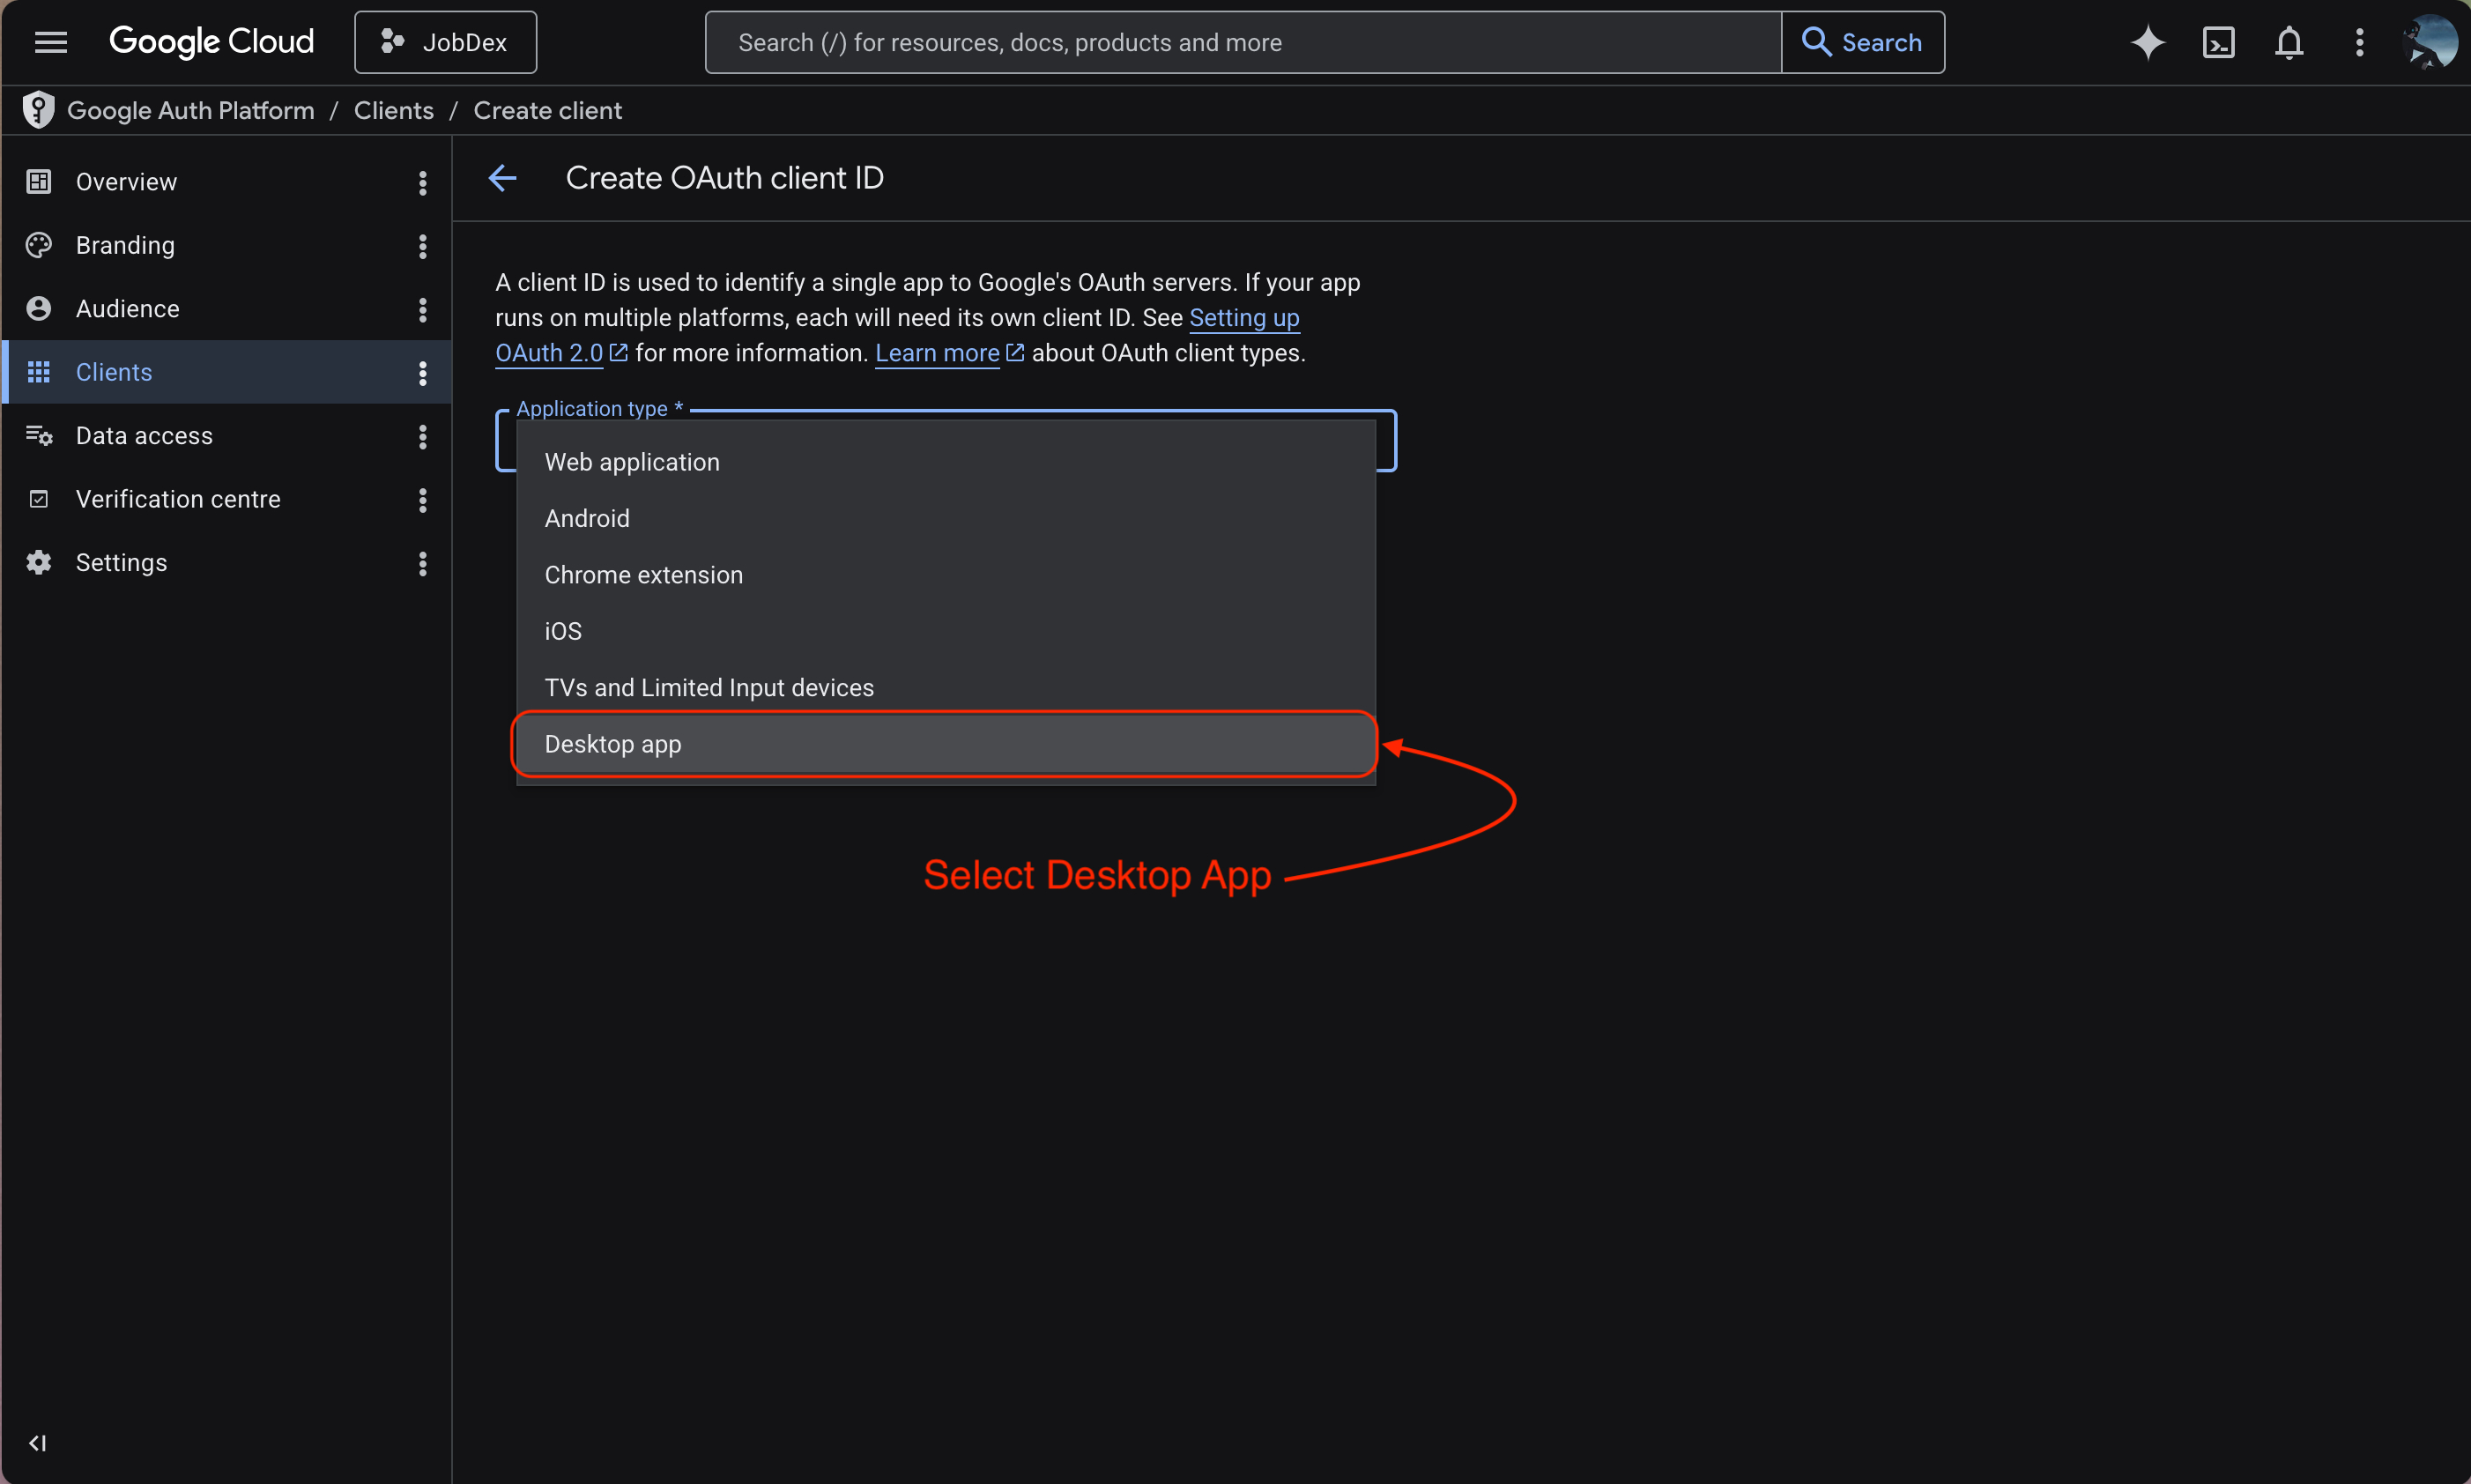
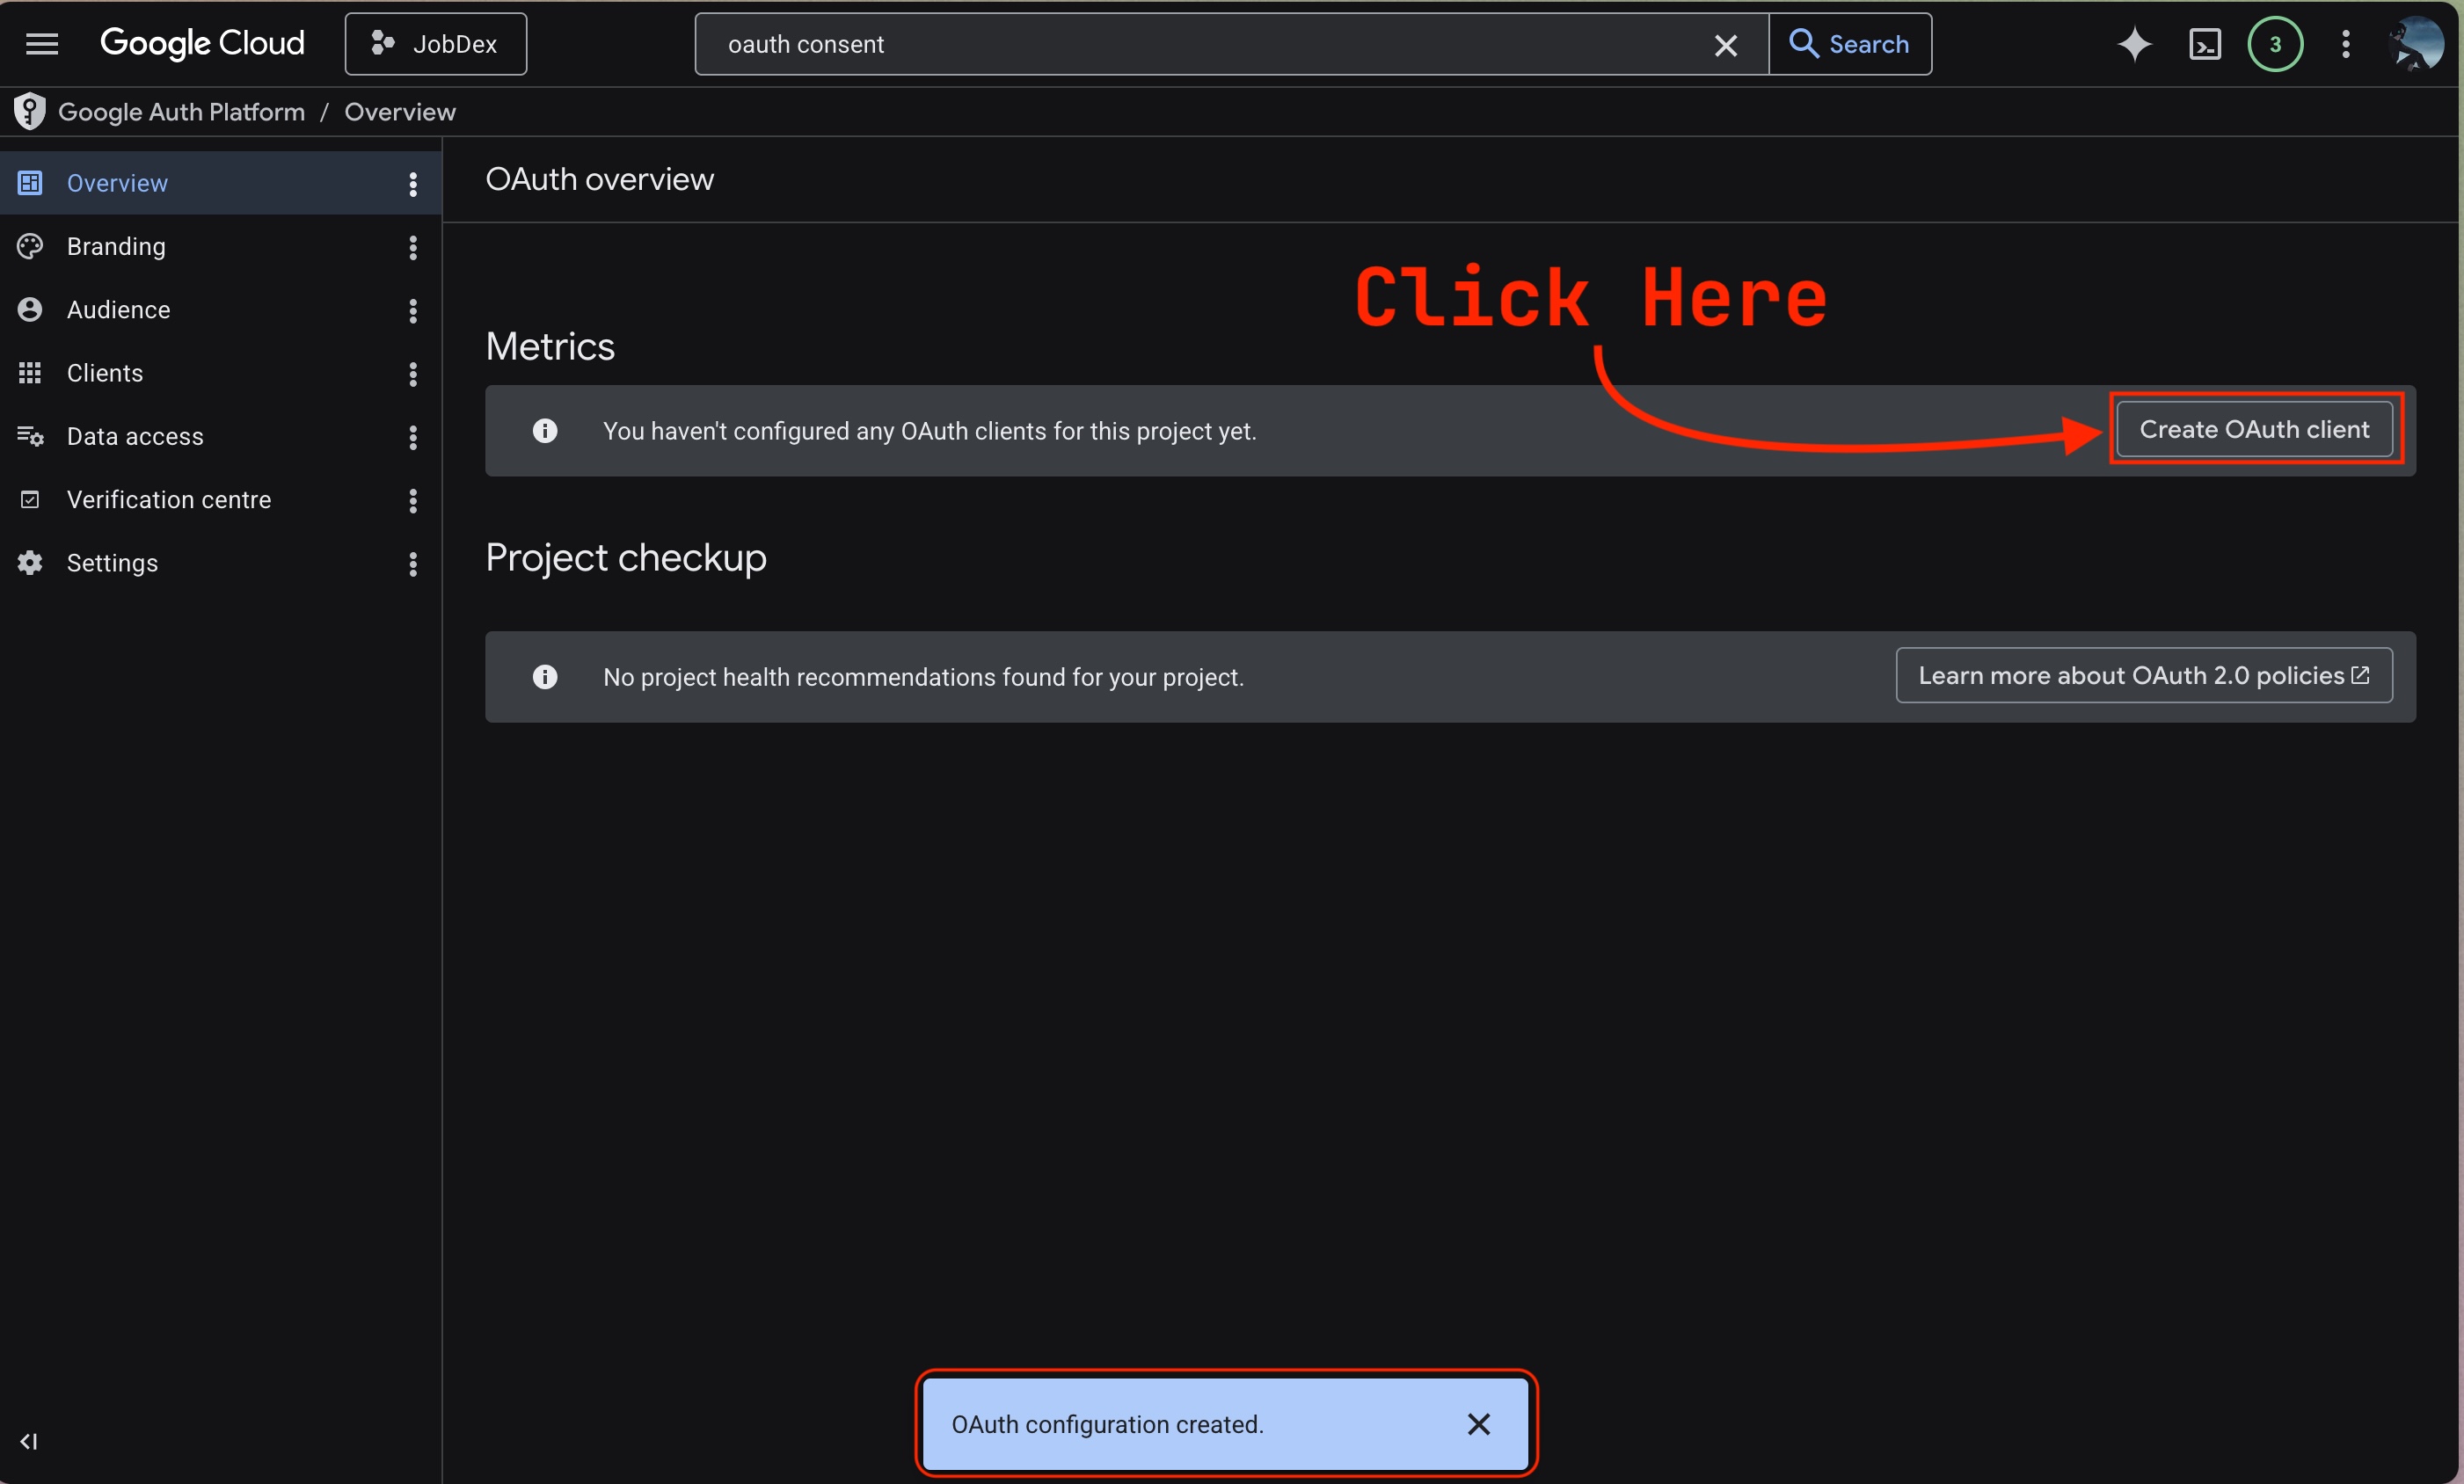
Create OAuth Client ID Once you hit Create, a follow-up screen will pop up. Click on "Create OAuth client". Select Desktop app as the application type. Enter whatever name you want (it doesn't matter), and click "Create".
-
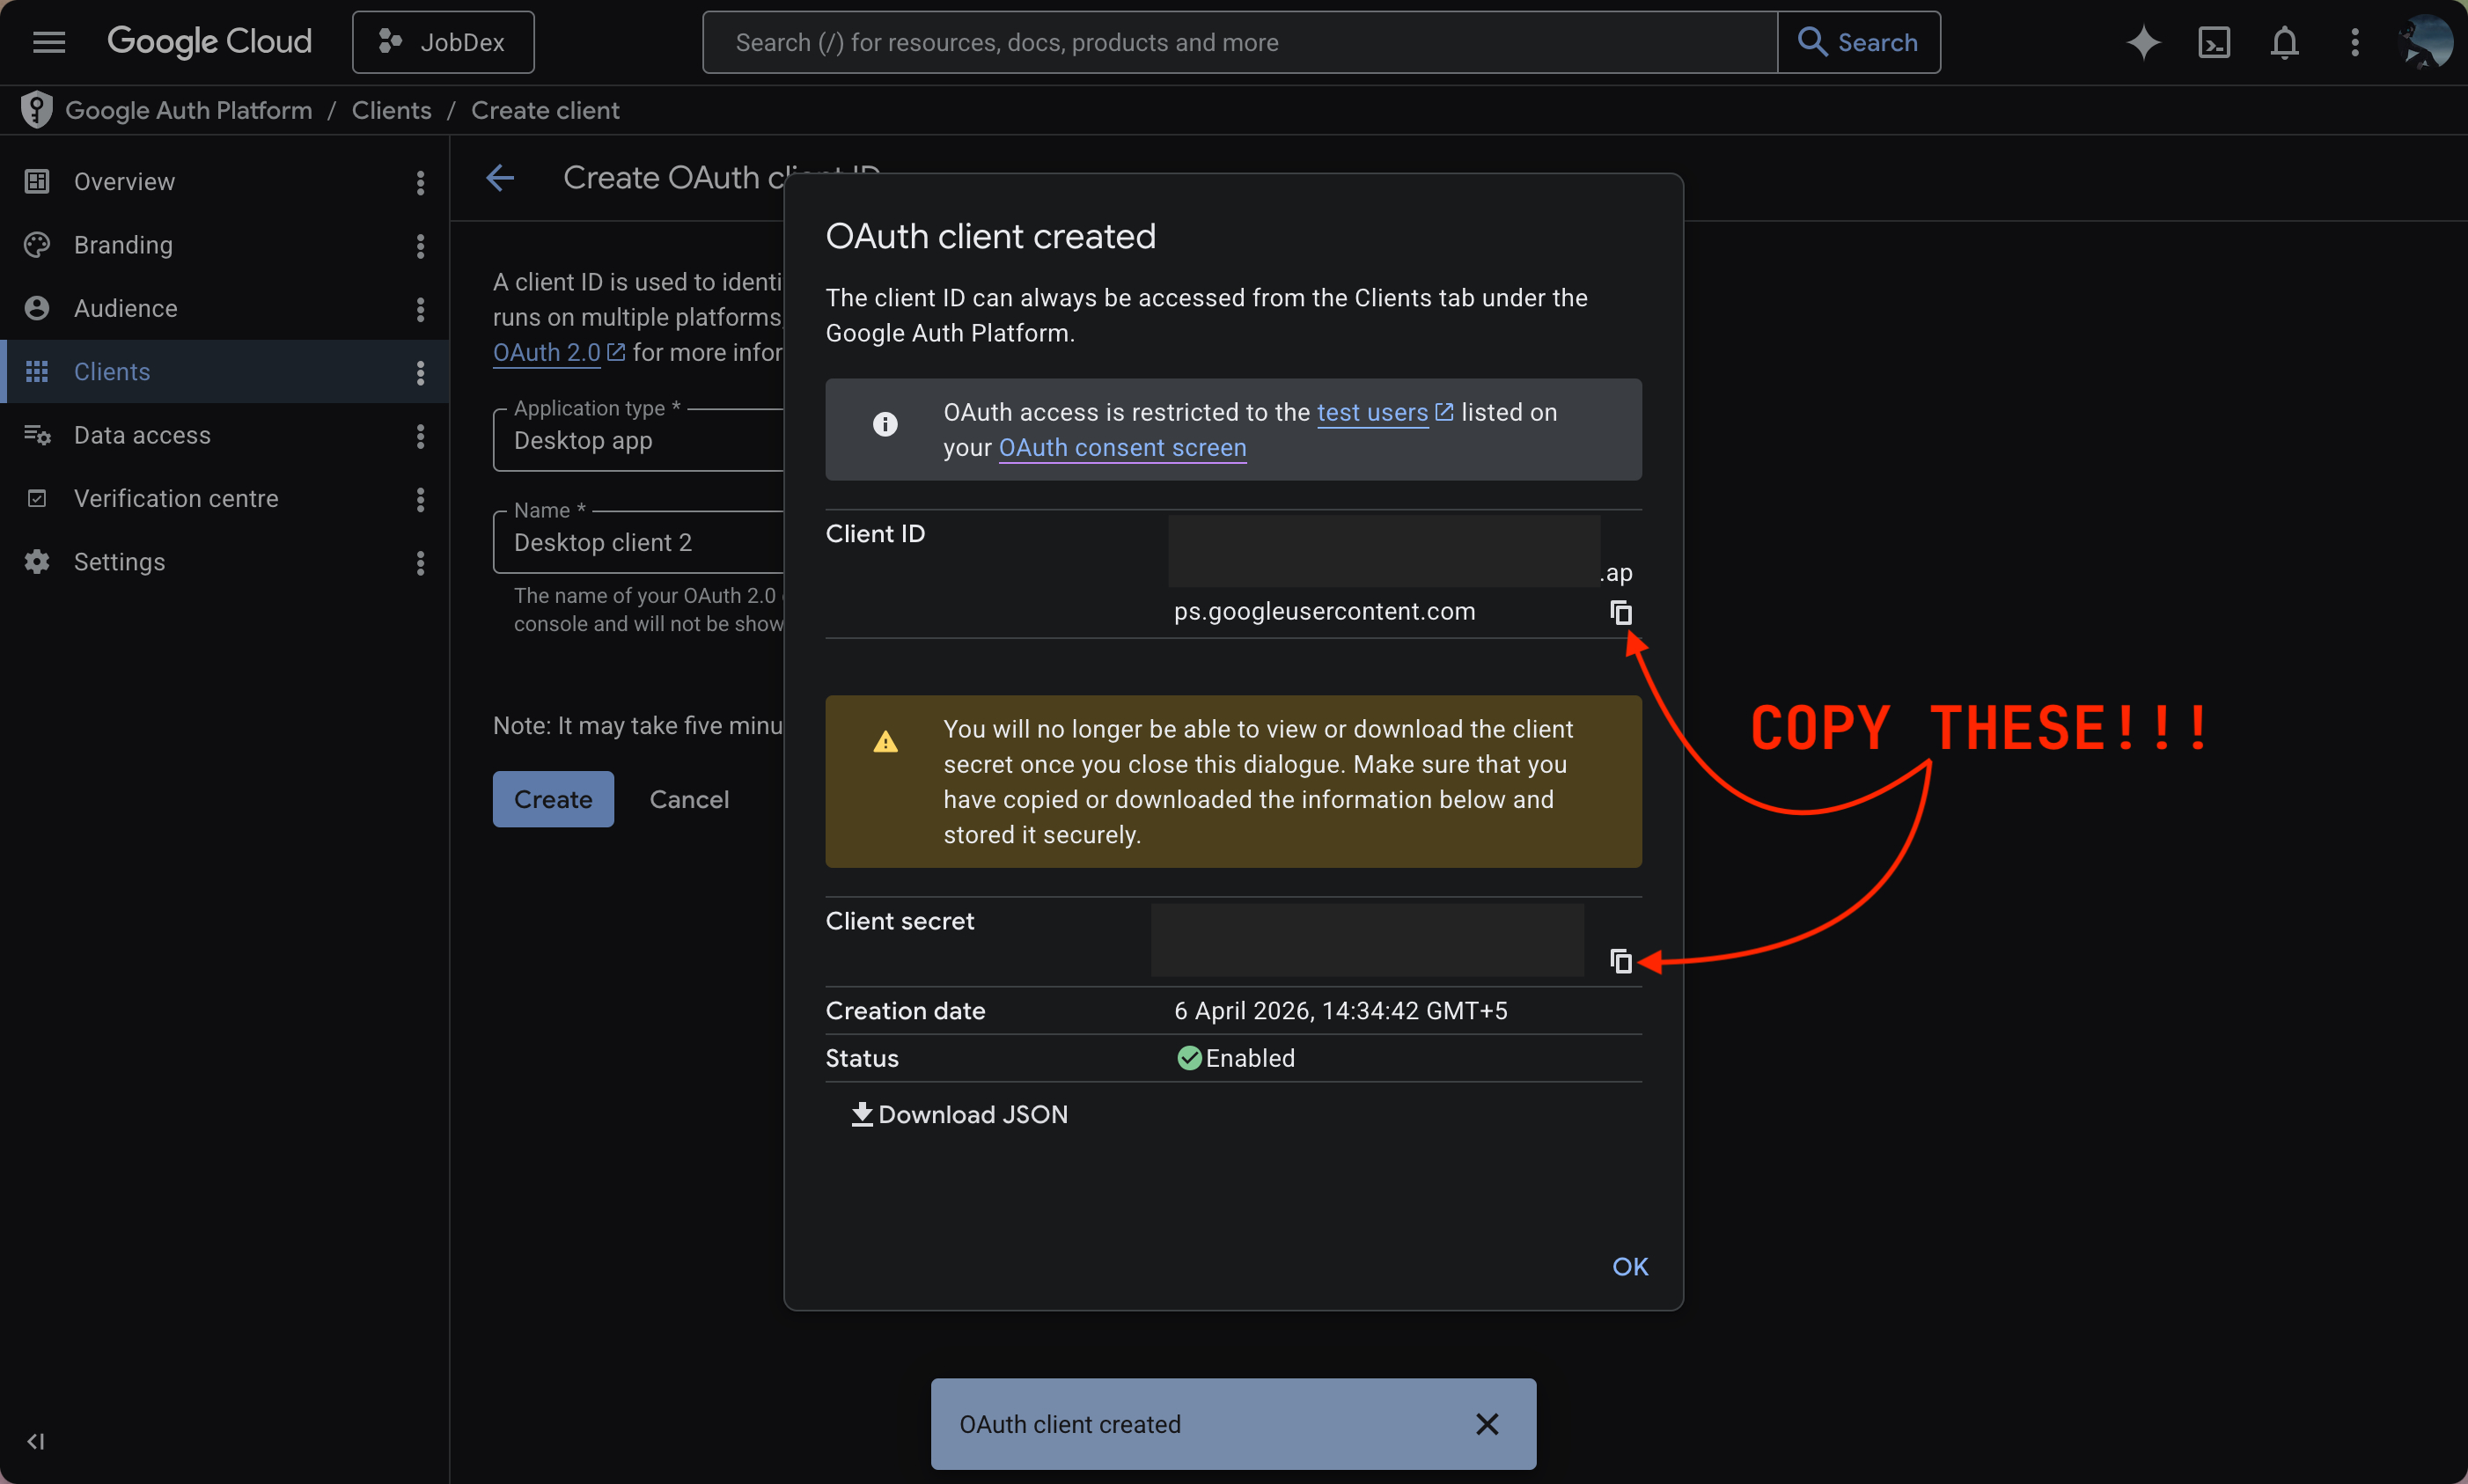
Copy your credentials An "OAuth client created" window will pop up showing your Client ID and Client secret. Copy both of these values somewhere safe temporarily — you'll need them in the next step.
-
Add yourself as a test user Click on "Audience" in the left sidebar menu. Under the "Test users" section, click "Add users". Enter the exact Gmail address you wish to use for sending emails, then click Save.
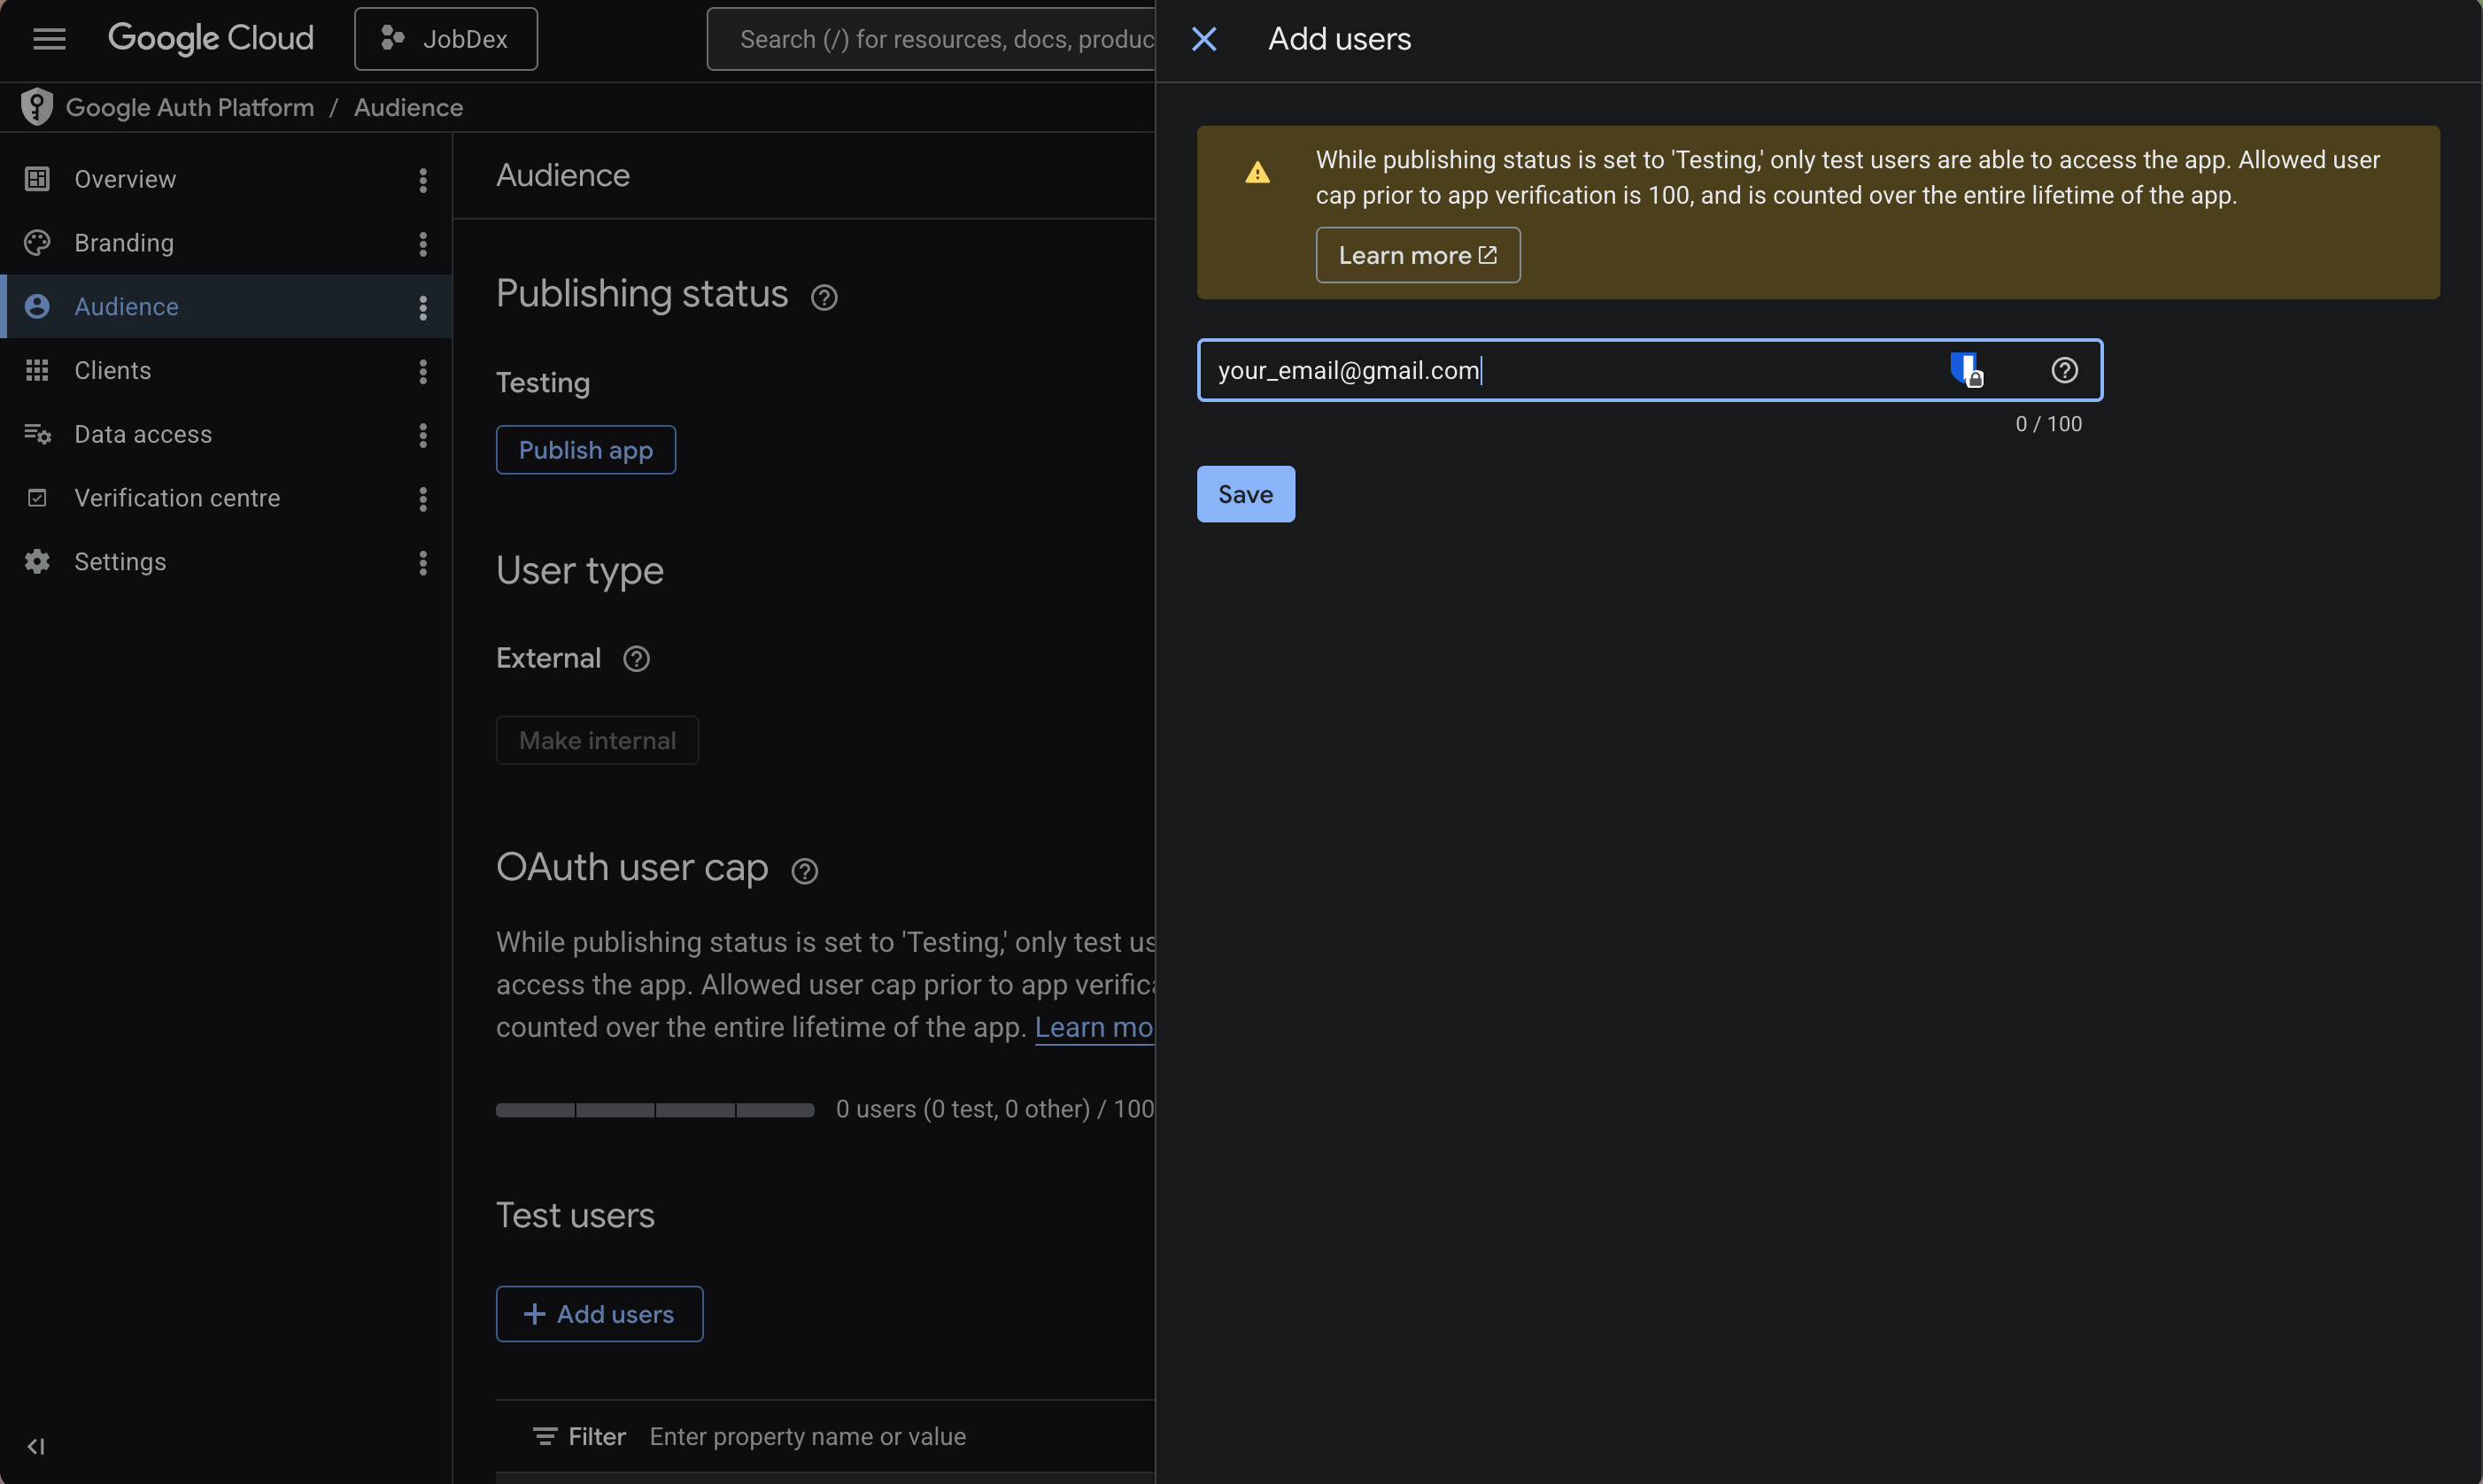
-
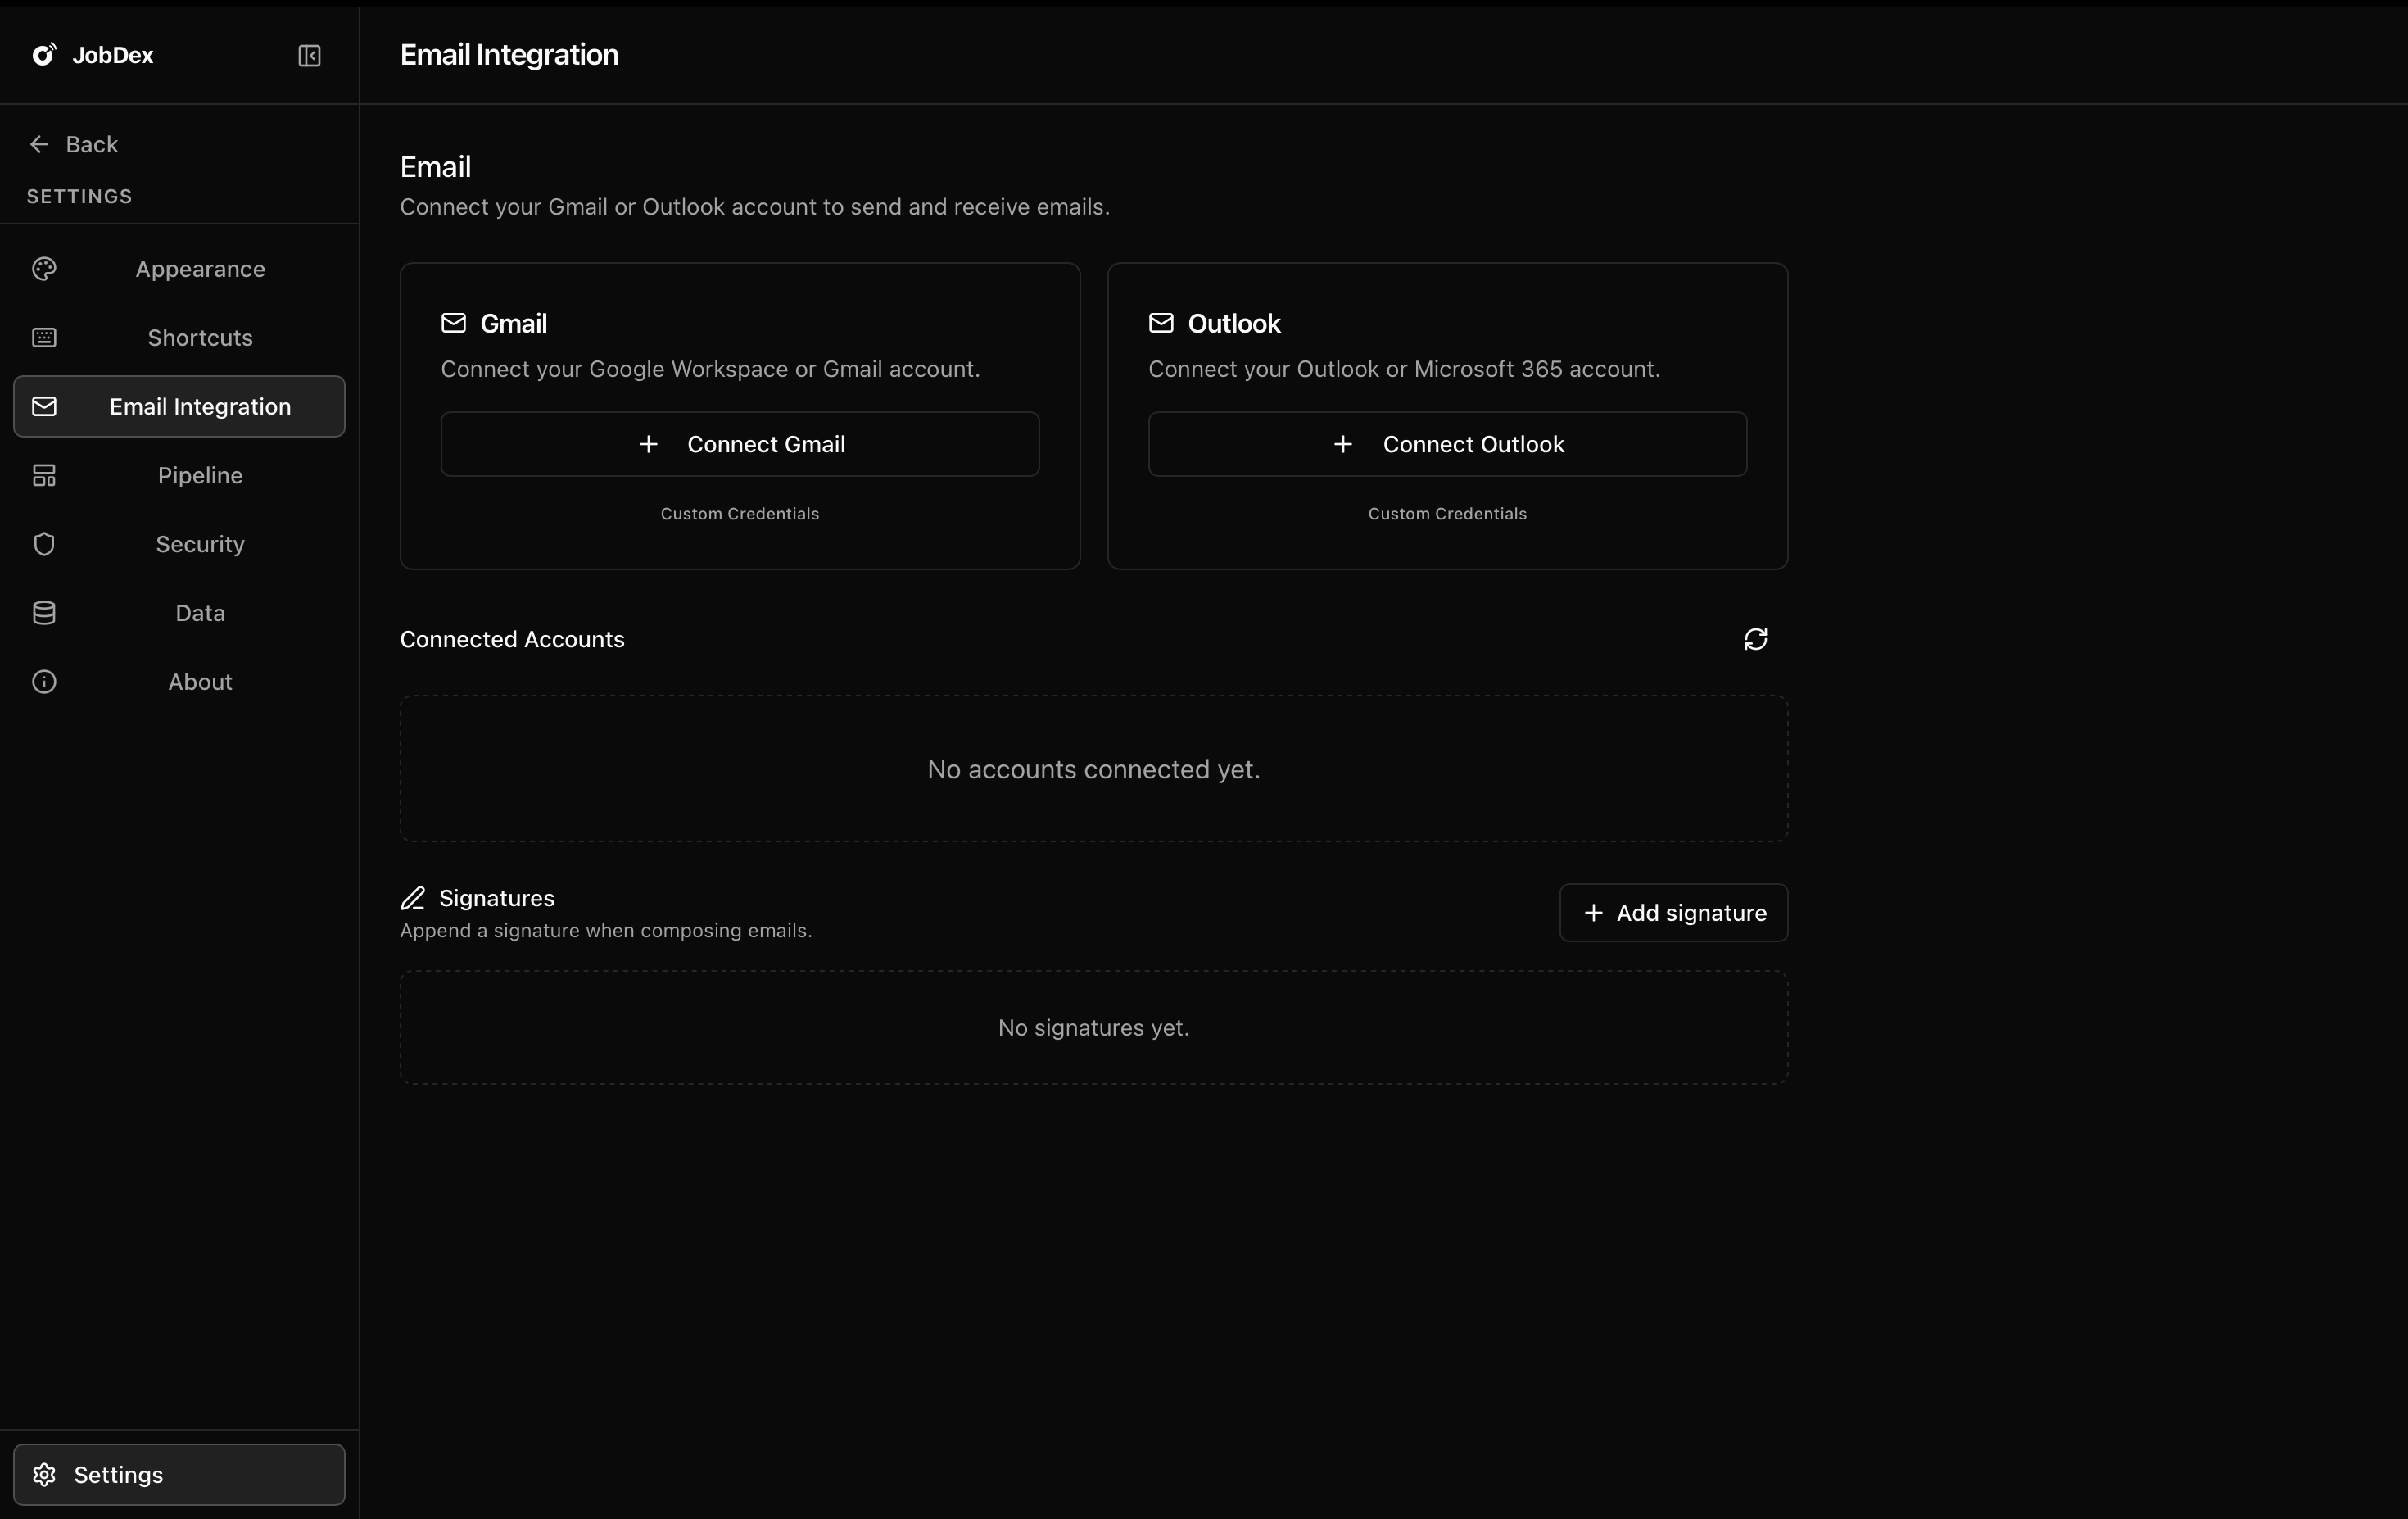
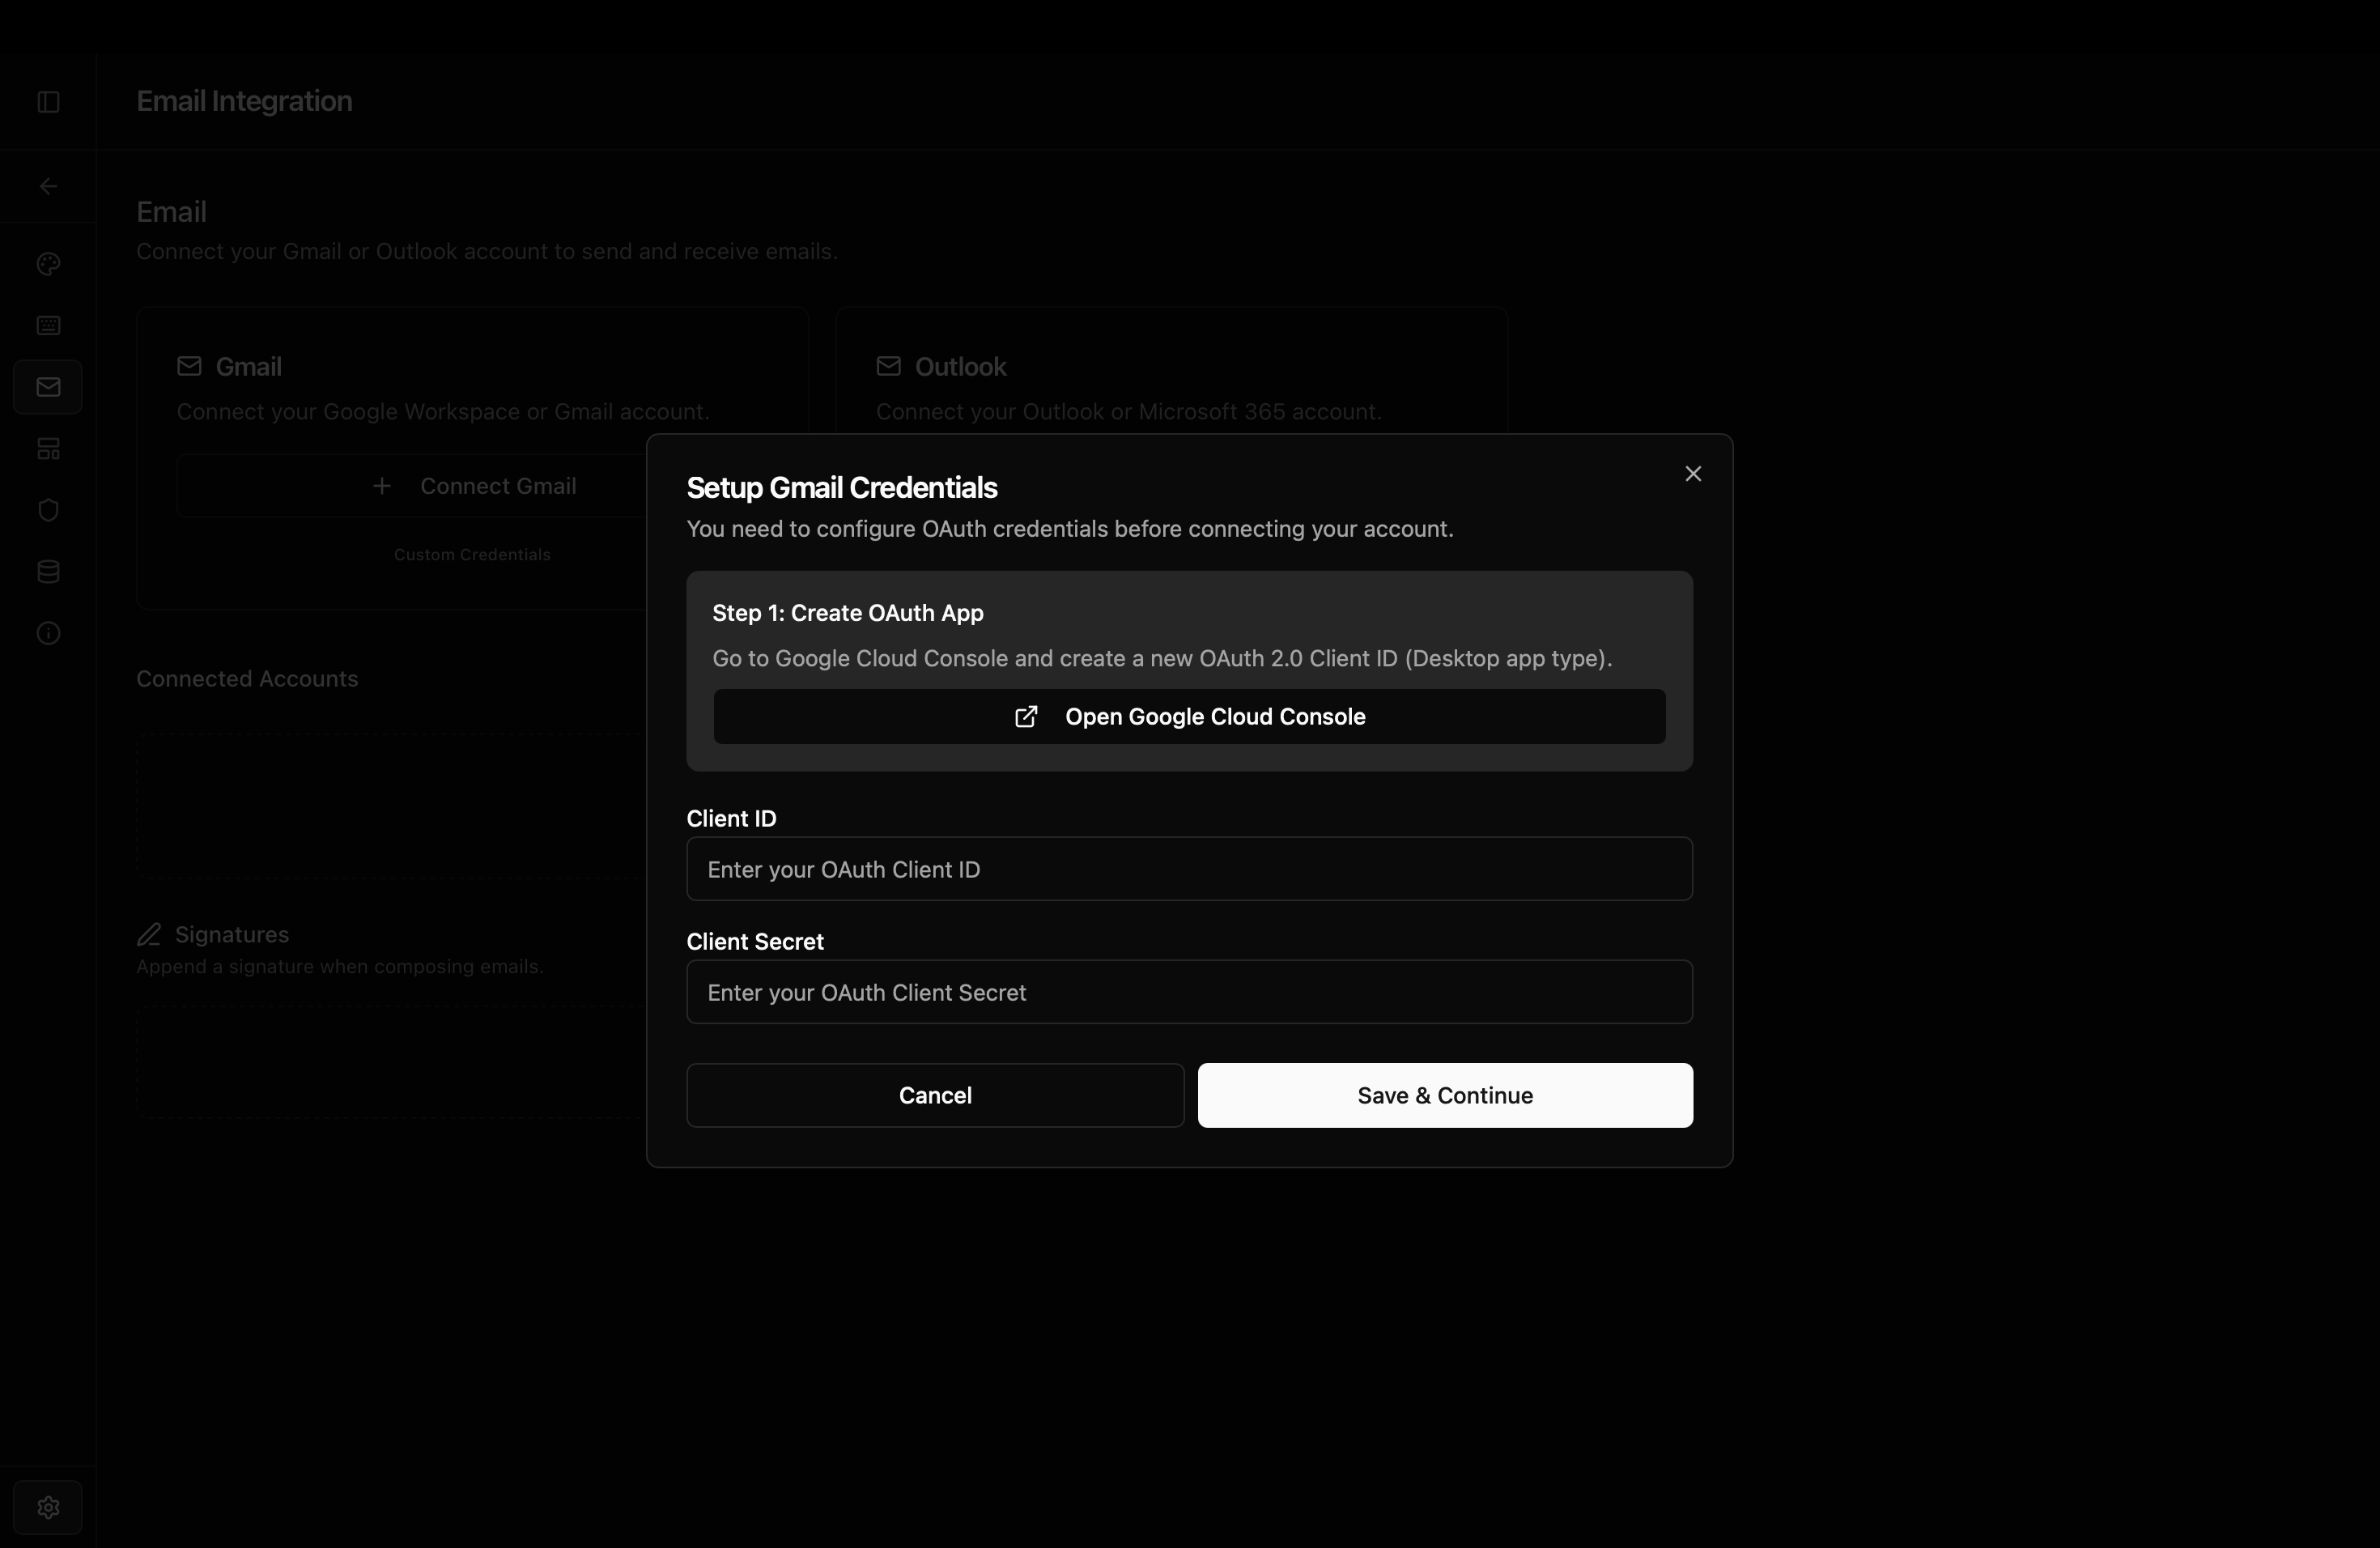
Enter credentials in JobDex Open JobDex and go to Settings → Email Integration. Click "Configure Gmail Credentials." Paste your saved Client ID and Client Secret into the fields and save.
-
Connect your account Click "Connect Gmail Account." Your browser will open with a Google sign-in screen. Sign in with the exactly same account you added as a test user in Step 8. You may see a warning saying "Google hasn't verified this app" — click "Advanced" then "Go to JobDex (unsafe)." This is completely normal for apps running in testing mode. Grant the requested permissions. Your browser will redirect, and JobDex will confirm the connection.
If you see an "Access blocked" error, it usually means you forgot to add your email to the "Audience" list in Step 8. Go back to the Google Cloud console, add your exact email under Test Users, and try again.
Until the app is fully verified by Google — which costs money and takes weeks of review that I'm working through — it runs in "testing mode." That's why you need to add yourself as a test user. It's a Google limitation, not a security issue. Add your own email and you're good.
Setting up Outlook
The Outlook setup follows a similar pattern through Microsoft Azure.
-
Go to Azure Portal Open portal.azure.com and sign in with your Microsoft account.
-
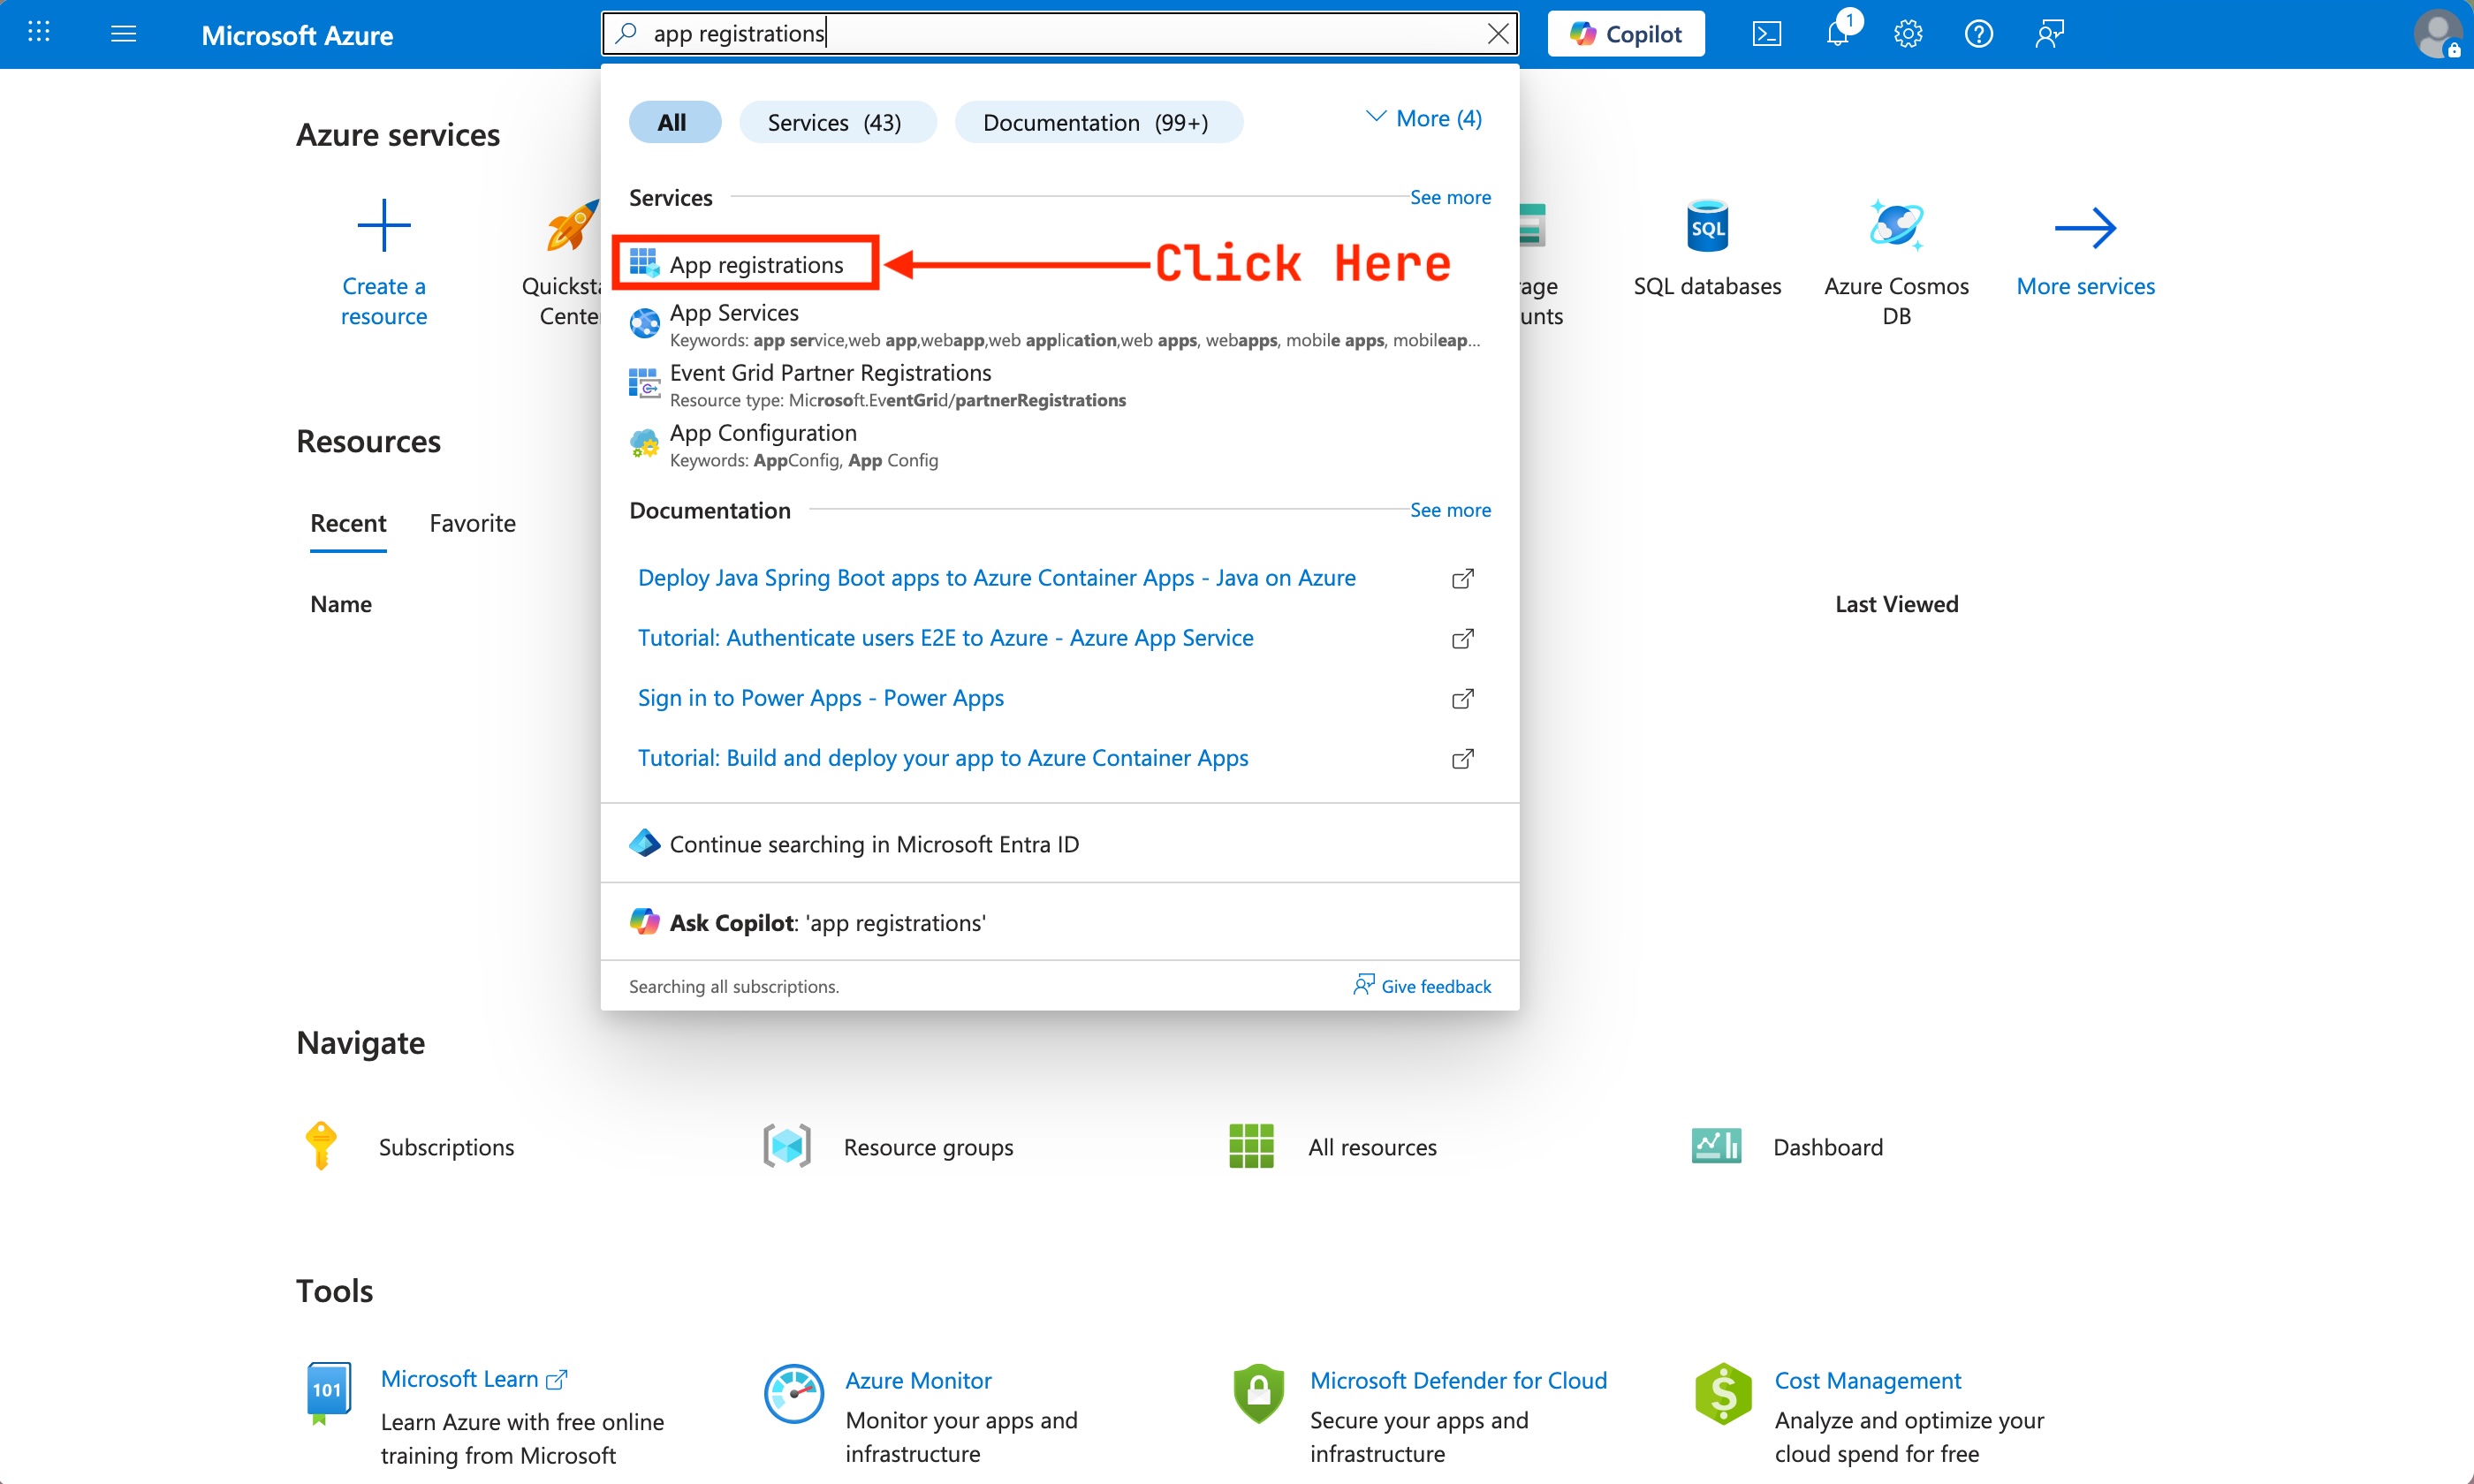
Register a new application Search for "App registrations" in the top search bar and select it. Click "New registration." Name it "JobDex," set Supported account types to "Accounts in any organizational directory and personal Microsoft accounts," and set the Redirect URI to Public client/native with the value
http://localhost:8080. Click "Register."

-
Copy your Application (Client) ID On the app overview page, copy the Application (client) ID. This is your Client ID.

-
Add API permissions In the left sidebar, click "API permissions." Click "Add a permission" → "Microsoft Graph" → "Delegated permissions." Search for and add:
Mail.Send,Mail.ReadWrite,offline_access. Click "Grant admin consent" if the button is available — that's fine if it's not, depending on your account type. -
Enter credentials in JobDex Open JobDex and go to Settings → Email Integration. Click "Configure Outlook Credentials." Enter your Client ID and save.
-
Connect your account Click "Connect Outlook Account." Your browser will open with a Microsoft sign-in. Sign in and grant permissions. JobDex will confirm the connection.
Once your account is connected, JobDex will sync your recent email threads so it can show you email history per contact. This happens in the background and may take a minute on first sync.
Microsoft's Azure portal is honestly more confusing than Google's console, but once you get through it, the connection is solid. If you get stuck on any step, open an issue and I'll help you through it.