Adding contacts
Add one manually
Click the "Add Contact" button in the top right of the People page, or press ⌘N (Mac) / Ctrl+N (Windows).
Only First Name and Last Name are required. Everything else — email, company, title, LinkedIn URL — is optional and can be filled in later.
Click Save. The contact appears in your list immediately.
Importing from LinkedIn
If you have a list of contacts from LinkedIn, a spreadsheet, or anywhere else, you can import them all at once via CSV or Excel. See the Importing Contacts section below for a full walkthrough.
What those fields actually mean
Summary — This is my favorite field in the whole app. It's freeform — write whatever context matters to you: how you met them, what they mentioned in a call, what role you're targeting, what to say in a follow-up. I built it because every CRM I've used buries the actually useful context behind structured fields that never quite fit.
Pipeline Status — Where this contact sits in your outreach process. More on this in the next section.
Tags — Optional labels for grouping contacts. I use things like "Series A", "Engineering", "Warm Lead", "Follow Up" — whatever categories make sense for how you think about your pipeline.
Understanding the pipeline
Every contact has a status — a label that tells you where the relationship stands. I set up five defaults that match a typical cold outreach flow:
- New — Just added, haven't reached out yet
- Contacted — You've sent an initial message
- Replied — They've responded
- Interested — Things are moving forward
- Not Interested — They passed or went cold
These are starting points, not rules. I wanted the pipeline to be yours, not mine — rename them, change their colors, create new ones, delete ones you don't use. All from Settings → Pipeline.
Kanban vs. Table
The People page has two views:
Table view — A spreadsheet-style list of all your contacts. Good for scanning, bulk editing, and filtering.
Kanban view — A board where each column is a status and each card is a contact. Drag a card to a new column to update their status. Good for visualising your pipeline at a glance.
Both views show the same data. Use whichever feels right for what you're doing. I personally switch between table view for bulk work and Kanban when I want to see the big picture.
The Kanban view is most useful once you have 20+ contacts spread across different stages. If you're just getting started, the table view is simpler.
Bulk actions
In table view, you can select multiple contacts using the checkboxes on the left. Once selected, a toolbar appears at the top with two actions:
- Bulk status update — Move all selected contacts to a new pipeline stage at once. Useful after a batch of follow-ups, or when you want to reclassify a group.
- Bulk delete — Remove all selected contacts. This is permanent and asks for confirmation.
Both actions run in a single transaction, so either everything updates or nothing does — no half-finished states.
Sending an email
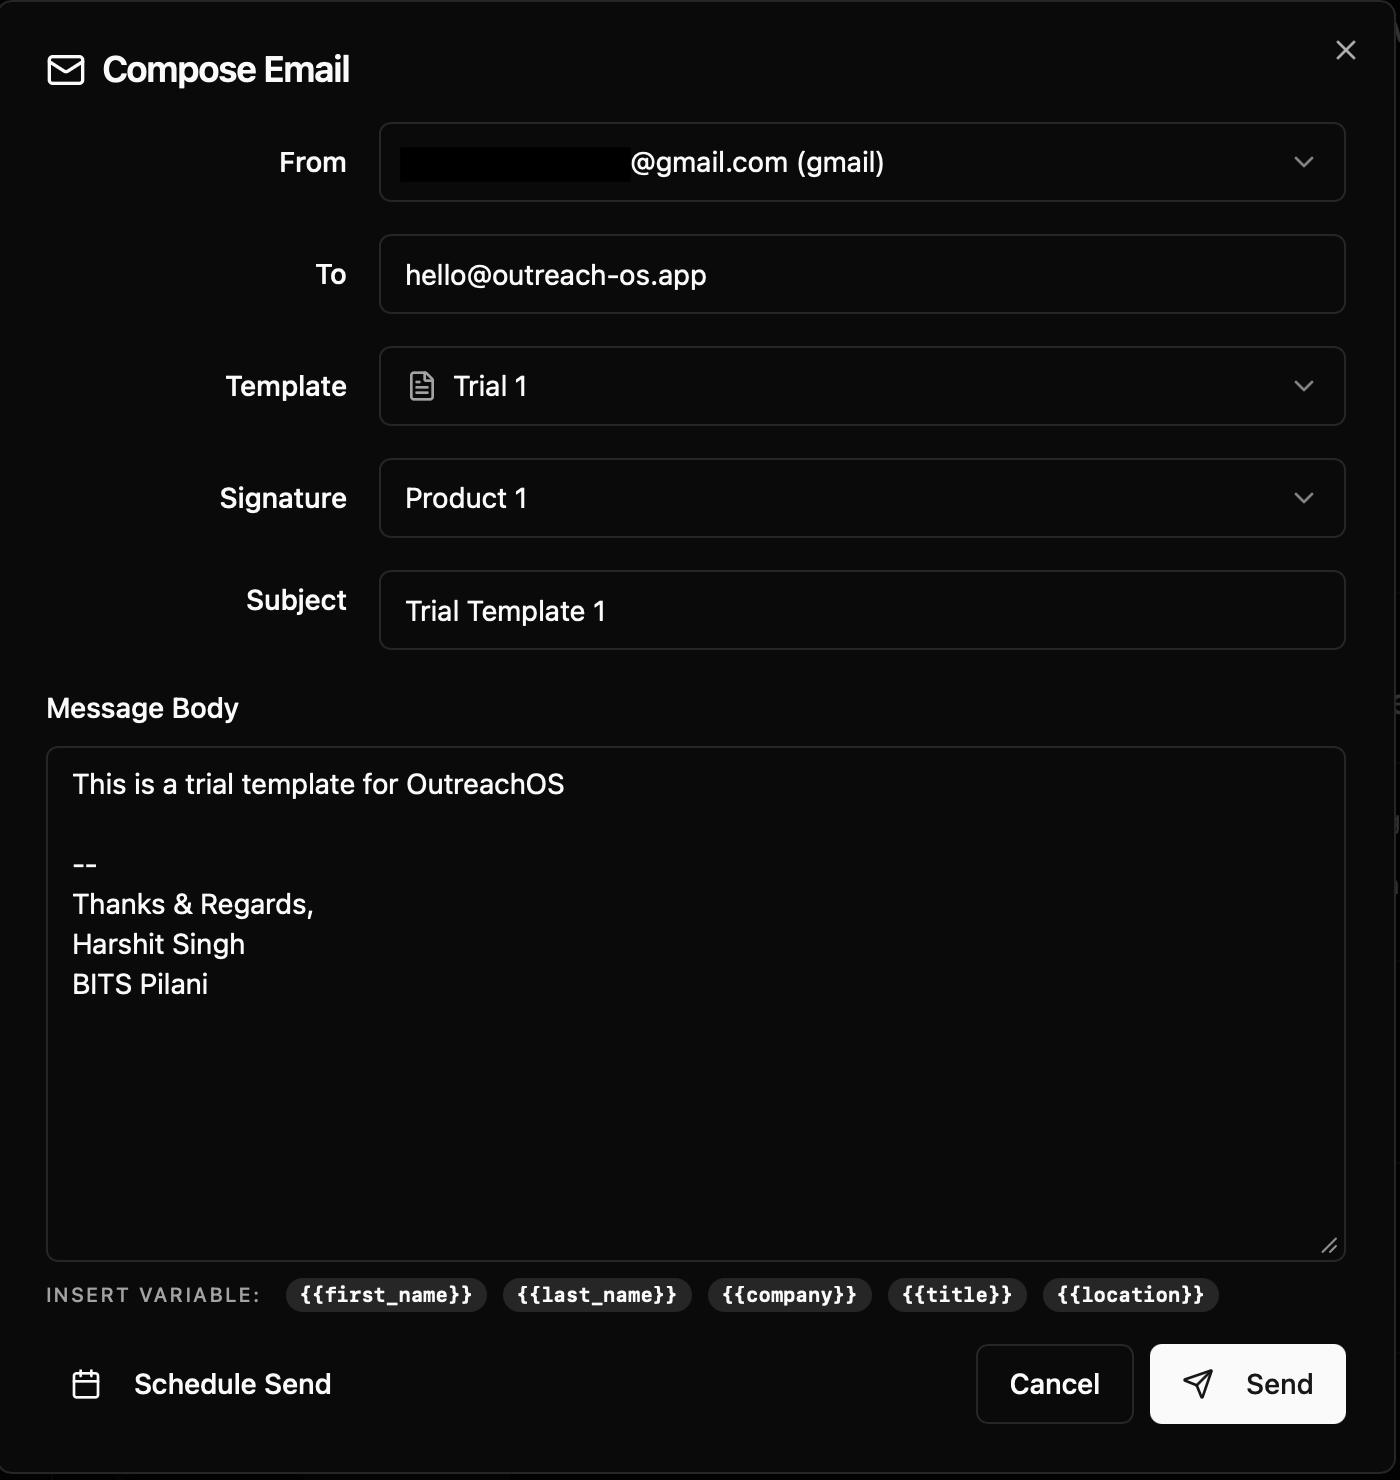
Open any contact's profile by clicking their name. From the profile, click "Compose Email" to open the compose window.
The compose window lets you:
- Write a subject and body
- Choose which connected email account to send from (if you have multiple)
- Send immediately or schedule for a future date and time
Sent emails appear in the Emails tab of the contact's profile, so you always have a record of what you sent and when.
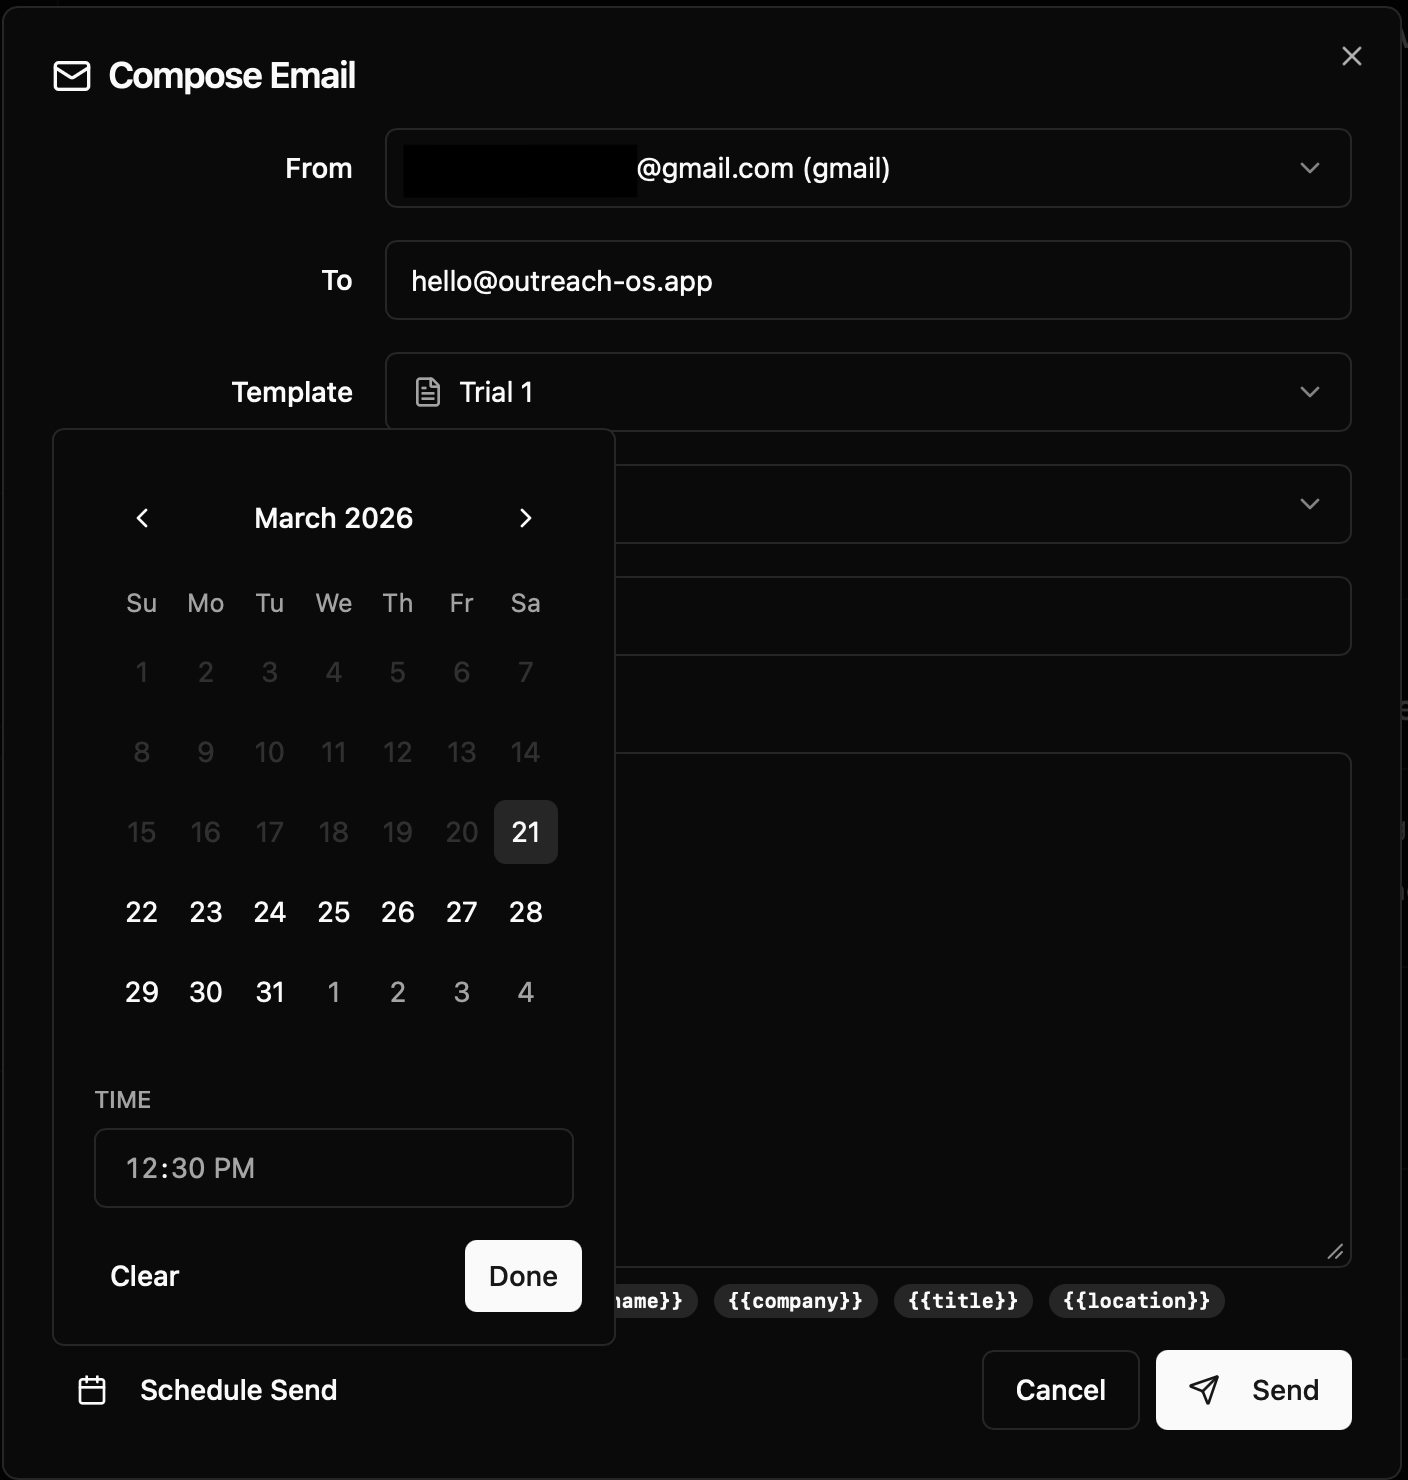
Scheduling
To schedule an email, click the dropdown arrow next to the Send button and select "Schedule." Pick a date and time. The email will sit in your queue and send automatically — as long as JobDex is running on your machine at that time.
Heads up: If you want to send scheduled emails even when JobDex is closed, you can enable the Background Service. Go to Settings → Appearance and toggle it on. When enabled, a small helper process stays running in your system tray to handle your delivery queue, so you don't have to worry about keeping the main app window open. You will still need to keep your device on. ;)
Email signatures
If you sign off every email the same way, save yourself the repetition. Go to Settings → Email Integration and scroll down to the Signatures section. Create as many as you need — one for formal outreach, one for follow-ups, whatever fits.
When you're composing an email, you'll see a signature picker at the bottom of the compose window. Pick one and it's appended to your message. You can still edit it inline before sending — it's a starting point, not a constraint.
Templates and mail merge
If you're sending the same type of email to many people — cold outreach, follow-ups, thank-you notes — templates keep you from rewriting the same thing every time. I built the merge system to be dead simple: you write the structure once, and JobDex fills in the personal details automatically.
Creating a template
Go to Templates in the sidebar. Click "New Template."
Give it a name (this is just for your reference — the recipient never sees it). Write your subject line and body.
Variables
Templates support merge variables — placeholders that get replaced with real contact data
when you send. Variables look like this: {{firstName}}
| Variable | What it becomes |
|---|---|
{{firstName}} |
Contact's first name |
{{lastName}} |
Contact's last name |
{{fullName}} |
Contact's full name |
{{companyName}} |
Contact's company |
{{title}} |
Contact's job title |
Example subject line:
{{firstName}}, quick question about your role at {{companyName}}
When sent to Sarah Chen at Stripe, this becomes:
Sarah, quick question about your role at Stripe
Using a template
When composing an email, click "Choose Template" to load one. The variables will be pre-filled based on the contact's saved data.
You can edit the email after loading a template — it's not locked. I designed templates as a starting point, not a straitjacket.
If a variable is blank (for example, the contact has no company saved), JobDex will insert an empty string. Before sending to a large list, make sure the relevant fields are filled in on each contact.
Importing contacts from LinkedIn (or any spreadsheet)
This was one of the first features I built, because I knew nobody wants to manually type in 200 contacts. If you have a spreadsheet from LinkedIn, a CSV you built yourself, or anything with headers, you can import everything at once.
How to export from LinkedIn
-
Go to linkedin.com and click your profile picture → "Settings & Privacy"
-
Click "Data privacy" → "Get a copy of your data"
-
Select "Connections" and request the archive
-
LinkedIn will email you a download link, usually within 10 minutes
-
Download and unzip the file — you want the file called
Connections.csv
Running the import
In JobDex, click the Import button in the top bar of the People page (or press ⌘I).
Step 1 — Column mapping: Select your CSV or Excel file. JobDex will read the column headers and ask you to map each one to a contact field. For a LinkedIn export, the mapping usually looks like this:
| LinkedIn column | Map to |
|---|---|
| First Name | First Name |
| Last Name | Last Name |
| Email Address | |
| Company | Company |
| Position | Title |
| LinkedIn Profile URL | LinkedIn URL |
Step 2 — Duplicate check: JobDex will scan for contacts already in your database and tell you how many new contacts it found vs. how many duplicates. I built three options because different situations call for different approaches:
- Skip duplicates — Only import new contacts. Existing records are untouched.
- Merge — Import new contacts, and fill in any missing fields on existing contacts (without overwriting anything you've already entered).
- Import all — Insert everything, ignoring duplicates.
For most people, Skip or Merge is the right choice.
Supported file formats
.csv(any spreadsheet exported as CSV).xlsx(Excel files)
Files must have a header row. Columns don't need to be in any particular order — you'll map them manually in Step 1.
Working with a contact
Click any contact's name from the People page to open their full profile. This is the most feature-rich page in the app — it's where you'll spend time once a contact is in your pipeline.
The layout
Left panel: Core info — name, title, company, email, location, LinkedIn URL, and tags. Click the edit icon to update any field.
Right panel: Four cards stacked vertically — Summary, Upcoming Events, Attached Files, and Pipeline Status.
Bottom tabs: Emails (full thread history with this contact) and Activity (timeline of everything that's happened).
Summary
The Summary card is freeform text — write whatever context matters to you. How you met them, what they mentioned in a call, what to bring up in your next email. I built it because every CRM I've used makes you squeeze useful information into fields that never quite fit. This one is yours to use however you want.
Upcoming events
Click "Add Event" to schedule a reminder — a follow-up call, a coffee chat, a deadline to send that email. The calendar picker lets you set the date, and you can add a title and description.
Events show up on the right panel as a chronological list. They're meant to be lightweight — think "follow up with Sarah next Tuesday" rather than a full calendar integration.
Attached files
The Files card lets you attach documents to a contact — a resume they sent you, a company brief, notes from a meeting. Click the attach icon, pick a file, and it's copied into JobDex's local storage.
- Click a filename to open it with your system's default viewer
- Click the trash icon to delete it — removes both the record and the file from disk
Files are stored locally in your app data directory, just like everything else in JobDex. Nothing leaves your machine.
Activity timeline
The Activity tab at the bottom shows a chronological log of everything that's happened with this contact:
- Status changes (e.g., "Moved to Replied")
- Emails you've sent through JobDex
- Events you've manually logged
- The original "Contact created" entry
You can delete any event from the timeline by hovering over it and clicking the delete icon — except the "Contact created" entry, which stays as a permanent record.
Actions from the profile
The profile header has quick-action buttons:
- Compose Email — opens the compose window pre-addressed to this contact (shortcut: ⌘⇧C on Mac, Ctrl+Shift+C on Windows)
- Edit — opens the full edit dialog for all fields
- Manage Tags — add or remove tags
- Delete — permanently remove this contact (with confirmation)
The Emails page
The Emails page (in the sidebar) gives you a view across all your connected email accounts in one place. It has two tabs:
Inbox
Shows every synced email thread that involves a contact in your database. Use the filter toggle to switch between All, Sent, and Received.
Click any message row to expand it and read the full body. Messages are linked to contacts automatically — JobDex matches sender/recipient email addresses against your contact records.
Email sync only pulls in threads that involve people in your contacts list. Your unrelated inbox messages are never fetched — JobDex isn't trying to be a full email client.
Scheduled
Shows all emails you've scheduled for future delivery. Each entry displays the recipient, subject, scheduled time, and status (pending or failed).
- Overdue emails (scheduled time has passed but the app wasn't running) are flagged
- Click Cancel on any pending email to remove it from the queue — a confirmation dialog appears first
- Failed emails show the error reason so you can troubleshoot
Command palette
Press ⌘K (Mac) or Ctrl+K (Windows/Linux) from anywhere in the app to open the command palette. It's the fastest way to get around.
Start typing to search your contacts by name, or jump to any page — People, Emails, Templates, Settings. The results update as you type, and you can navigate them with arrow keys and Enter.

I built this because clicking through sidebar links felt slow once I had 100+ contacts. The palette is designed to be the app's nervous system — if you learn one shortcut, make it this one.
Keyboard shortcuts
I'm a keyboard person, so I built shortcuts for everything I use frequently. Press ⌘/ (Mac) or Ctrl+/ (Windows/Linux) in the app to see the full list at any time.
Actions
| Action | macOS | Windows / Linux |
|---|---|---|
| New Contact | ⌘N |
Ctrl+N |
| Compose Email | ⌘⇧C |
Ctrl+Shift+C |
| Import Contacts | ⌘I |
Ctrl+I |
Compose Email only works when you're on a contact's detail page — it needs to know who you're writing to. If you press it from anywhere else, a toast will tell you where to go.
Navigation
| Destination | macOS | Windows / Linux |
|---|---|---|
| Dashboard | ⌘1 |
Ctrl+1 |
| People | ⌘2 |
Ctrl+2 |
| Emails | ⌘3 |
Ctrl+3 |
| Tasks | ⌘4 |
Ctrl+4 |
| Templates | ⌘5 |
Ctrl+5 |
System
| Action | macOS | Windows / Linux |
|---|---|---|
| Command Palette | ⌘K |
Ctrl+K |
| Shortcuts Help | ⌘/ |
Ctrl+/ |
| Settings | ⌘, |
Ctrl+, |
Customizing shortcuts
Every shortcut can be rebound. Go to Settings → Keyboard and click any shortcut's key badge to enter capture mode. Press your desired key combination — if it doesn't conflict with another shortcut, it's saved instantly.
If you ever want to go back, each customized shortcut has a reset icon on hover, and there's a "Reset all" button at the top of the page to restore everything to factory defaults.